May 17, 2026
How to Build a Portable JSON-to-Video Workflow with VideoFlow
Set up a JSON-first video pipeline in TypeScript that can render in the browser, on a server, or in a live preview.

How to Build a Portable JSON-to-Video Workflow with VideoFlow
If you need to generate videos from structured data instead of hand-editing timelines, VideoFlow gives you a clean path: write your scene once as JSON or TypeScript, then render it in different environments without rewriting the project. That matters when you are building marketing video generators, AI-agent workflows, in-app editors, or batch rendering pipelines.
VideoFlow is the open-source toolkit behind that flow. Its core package, @videoflow/core, lets you describe a video in TypeScript and compile it to portable VideoJSON. From there, you can render the same project in the browser, on a server, or in a live DOM preview.

1. Start With The Problem You Are Solving
Before you write code, decide what kind of video pipeline you need. VideoFlow works best when the project is repeatable and structured. Common examples include:
- Product demos generated from catalog or app data.
- Personalized videos generated from CRM or ecommerce inputs.
- Social clips built from reusable templates.
- AI-agent workflows that emit scene data instead of manually editing a timeline.
- SaaS apps that need an embedded editor and MP4 export.
If your project is fully manual and one-off, a traditional video editor is usually the better fit. If your goal is to generate the same kind of video many times with changing content, a JSON-first workflow is the right abstraction.
2. Define Your Scene In TypeScript
Install the core package:
npm install @videoflow/core
Then create a scene with the fluent API. VideoFlow supports sequential composition, parallel branches, grouping, keyframes, transitions, captions, audio, and multiple layer types. The point is not just to draw shapes. The point is to make a video easy to generate, diff, store, and render later.
import VideoFlow from "@videoflow/core";

const $ = new VideoFlow({
  name: "Launch Clip",
  width: 1920,
  height: 1080,
  fps: 30,
});

$.addText(
  {
    text: "Launch your workflow",
    fontSize: 7,
    fontWeight: 800,
  },
  {
    transitionIn: { transition: "overshootPop", duration: "500ms" },
  }
);

$.wait("1s");

const json = await $.compile();
const blob = await $.renderVideo();
The expected result is simple: your scene compiles into portable VideoJSON, and that JSON becomes the source of truth for rendering and editing.
3. Treat VideoJSON As The Portable Asset
The main advantage of VideoFlow is portability. Once the project is represented as JSON, you can move it between environments without reauthoring the scene. That helps in three situations:
- The browser renderer is useful when a user exports video directly from the app.
- The server renderer is useful for APIs, queues, scheduled jobs, or batch generation.
- The DOM renderer is useful for live previews and editor experiences.
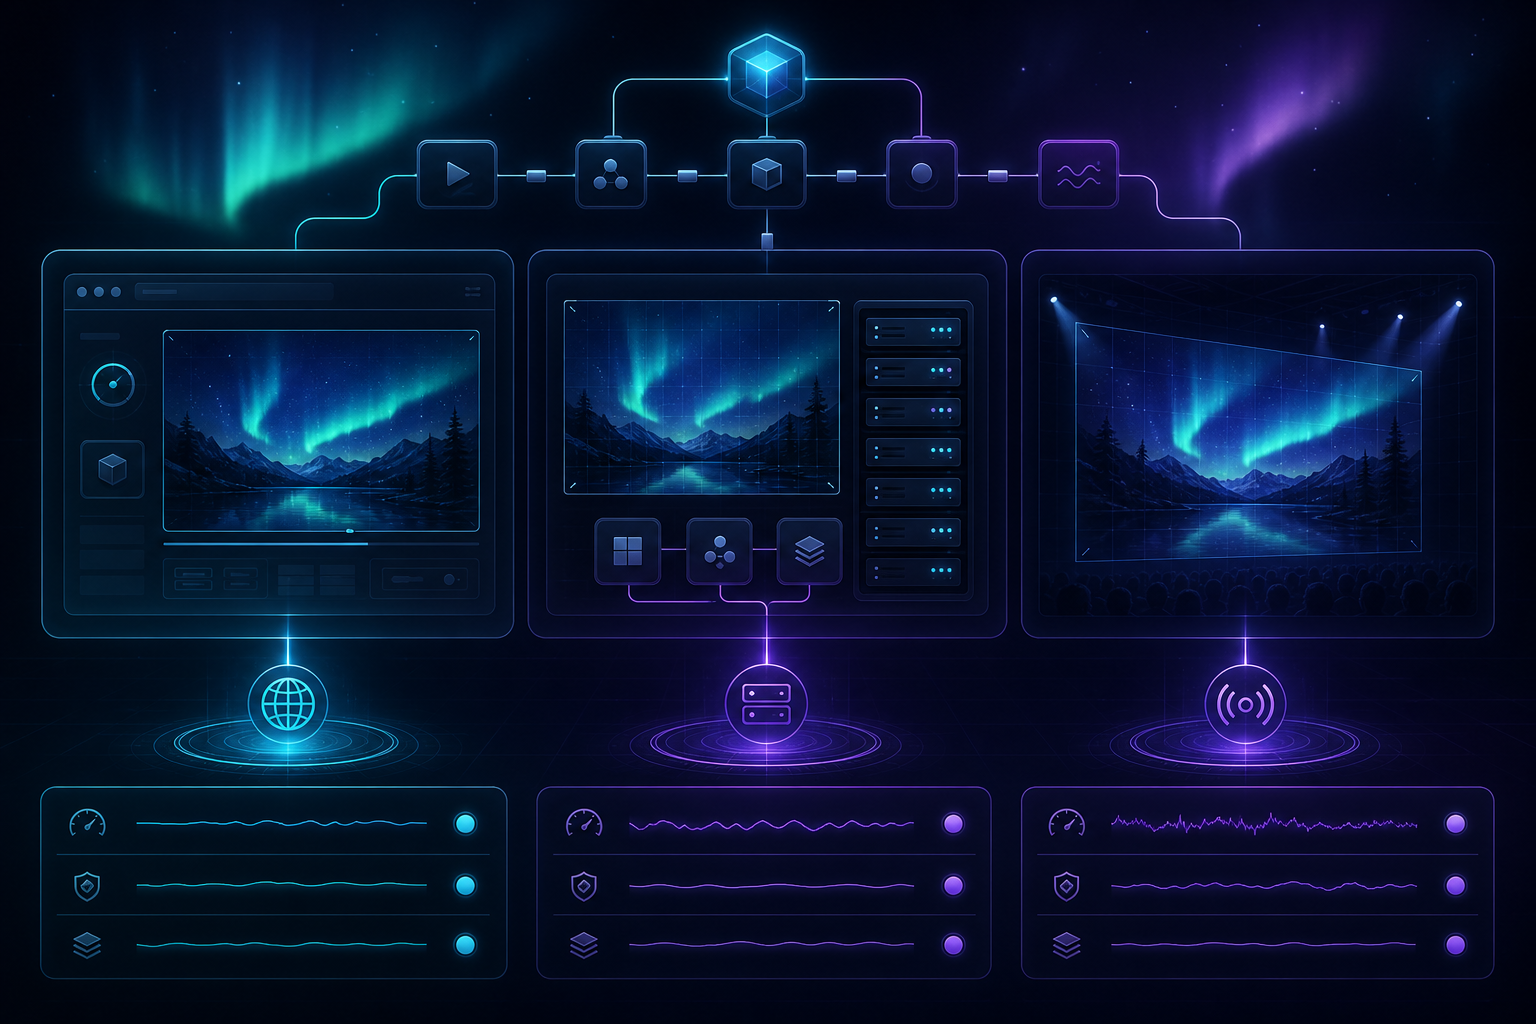
That separation keeps the video definition stable while the output target changes. A SaaS team can render locally for fast feedback, then hand the same JSON to a backend job for a final MP4.
If you want to explore the API surface before coding, the product docs are here: Docs, Core docs, Renderers docs, and the React Video Editor.
4. Choose The Right Renderer For The Job
Use the renderer that matches the user experience you need. The rule is straightforward:
- Use
@videoflow/renderer-browserwhen the user should export inside the browser and you want to avoid upload and render-server overhead. - Use
@videoflow/renderer-serverwhen you need headless rendering from Node.js, especially for APIs or queues. - Use
@videoflow/renderer-domwhen you need a scrubbable, live preview in the product UI.
This is where VideoFlow differs from a single-purpose rendering library. The same scene can drive multiple output paths, which reduces the chance that your preview and final render drift apart.
A practical implementation pattern is to keep a shared scene builder in a package or repo folder, then pick the renderer at the edge of your application. That makes the rendering decision an infrastructure concern, not an authoring concern.
5. Add A Template Structure You Can Reuse
Once your first scene works, convert it into a template. That is usually where the real value appears. Reusable templates let you swap product names, prices, chart values, headlines, or thumbnails without rebuilding the motion system each time.
VideoFlow supports the building blocks you need for this: layer groups, keyframes, transitions, effects, captions, and multiple media types. If you are building larger compositions, the grouping model helps you treat cards, lower-thirds, and scene fragments as reusable units.

For a team workflow, this usually becomes:
- Define a template in TypeScript.
- Compile it into VideoJSON.
- Feed real data into the template.
- Render a preview in the browser or DOM.
- Export the final MP4 on the server or in the browser.
That sequence is easy to automate and easy to version in Git.
6. Put The Editor In Front Of Non-Developers
If your app needs a visual editing layer, VideoFlow also includes a React video editor component. The editor gives you a multi-track timeline, keyframe controls, drag-and-drop editing, a live preview, and MP4 export. That lets product teams expose controlled editing without abandoning the underlying JSON source of truth.
This is the part that matters most for maintainability. The code and the editor are not separate systems. They are two interfaces to the same video model. That reduces drift, makes QA simpler, and keeps your templates versionable.
7. Compare The Workflow To Adjacent Video Posts
If you are building out a broader video pipeline, these related guides may help you choose the right pattern:
- How to Generate MP4 Videos from JSON with TypeScript
- How to Build a Browser-Based MP4 Export Pipeline with VideoFlow
- How to Turn JSON Into MP4 Videos in TypeScript with VideoFlow
- How to Create UGC-Style Shopify Product Videos Without a Shoot
The right choice depends on the same question every time: are you solving a one-off editing problem, or are you building a repeatable video system?
8. Ship The Smallest Useful Version First
The most reliable path is to start with one template, one renderer, and one export target. Do not begin by supporting every environment at once. A small working pipeline is easier to test and easier to trust.
A good first release usually includes:
- One TypeScript scene builder.
- One or two reusable layer groups.
- One renderer path for the initial launch.
- A preview flow that shows the same scene the user will export.
- A final MP4 output that can be stored, shared, or scheduled.
Once that works, expanding to server rendering, browser export, and editor-driven updates becomes an extension of the same model rather than a rewrite.
Conclusion
If you need a portable video pipeline, VideoFlow gives you a practical structure: author the scene in TypeScript, compile it into JSON, and render it where it makes the most sense. That makes videos easier to generate, preview, edit, and automate.
Start with one template in @videoflow/core, then test it in the playground and choose the renderer that matches your product.