May 23, 2026
How to Host a Webflow CMS Site on GitHub Pages with ExFlow
Export a Webflow CMS site with ExFlow, verify the static bundle, and publish it on GitHub Pages without breaking the build.

How to Host a Webflow CMS Site on GitHub Pages with ExFlow
If your Webflow site is ready for a cheaper, simpler hosting setup, GitHub Pages is a good target because it is built for static files. The part that usually trips people up is the export itself: you do not want a generic crawler that only captures the surface HTML. You want the full Webflow site, including CMS pages, CSS, JS, images, and the bits that make the site behave the same after export. ExFlow is built for that workflow.
The basic process is:
- Export the Webflow site with CMS pages enabled.
- Check the bundle before you publish anything.
- Put the exported files in a repo that GitHub Pages can serve.
- Verify the live URLs after the Pages build finishes.
What You Need
Before you start, make sure you have:
- A published Webflow site or a stable site URL to export.
- Access to ExFlow.
- A GitHub repository ready for static hosting.
- A decision on whether you want to push manually or use Git Sync.
- A place to keep custom files like style.css and script.js if your site relies on them.
If your site uses CMS content, the main rule is simple: export all pages, not just the homepage and a few linked routes. ExFlow supports exporting Webflow sites as downloadable static content, which is the right shape for GitHub Pages.
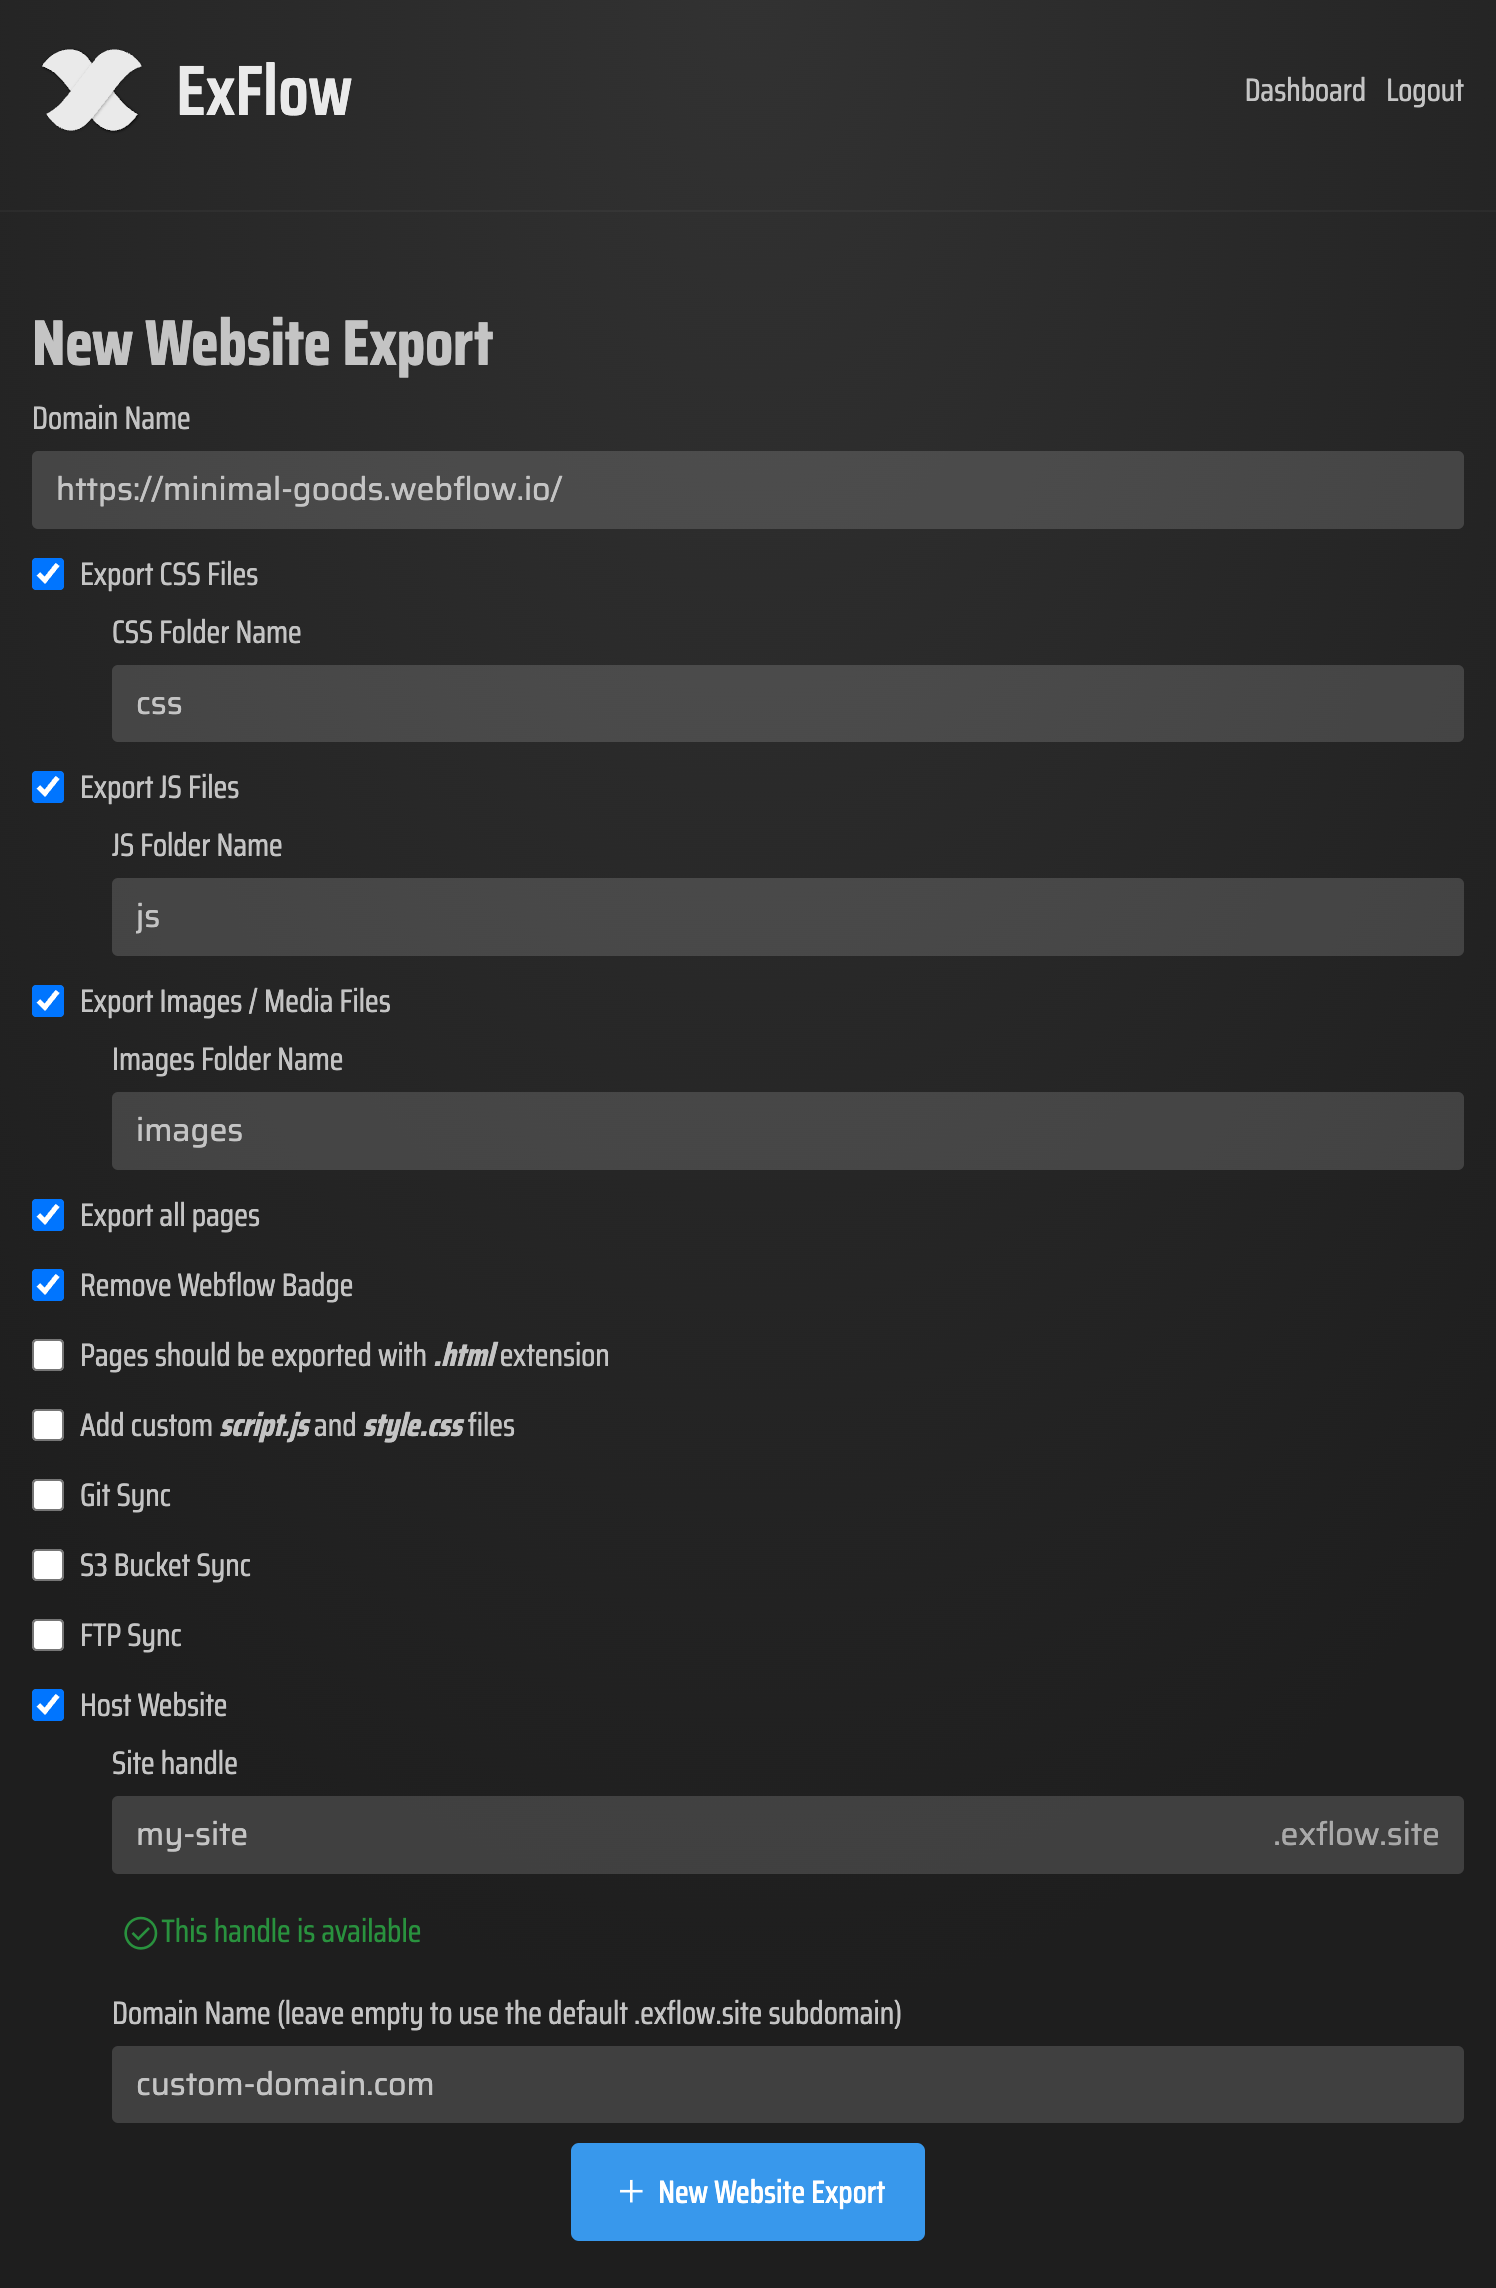
1. Set The Export Options First
Open ExFlow.site and enter the Webflow URL you want to export. Then choose the export settings that match your site:
- Export CSS files
- Export JS files
- Export images and media files
- Export all pages
- Remove the Made with Webflow badge if you want a cleaner static bundle
- Add custom script.js and style.css files if your site needs them
If you plan to sync straight into Git, configure Git Sync at the same time. That keeps the export and the deployment path connected, which is helpful if you expect to repeat the workflow later.
Expected result: you know exactly what will be in the static export before the files land in GitHub Pages.

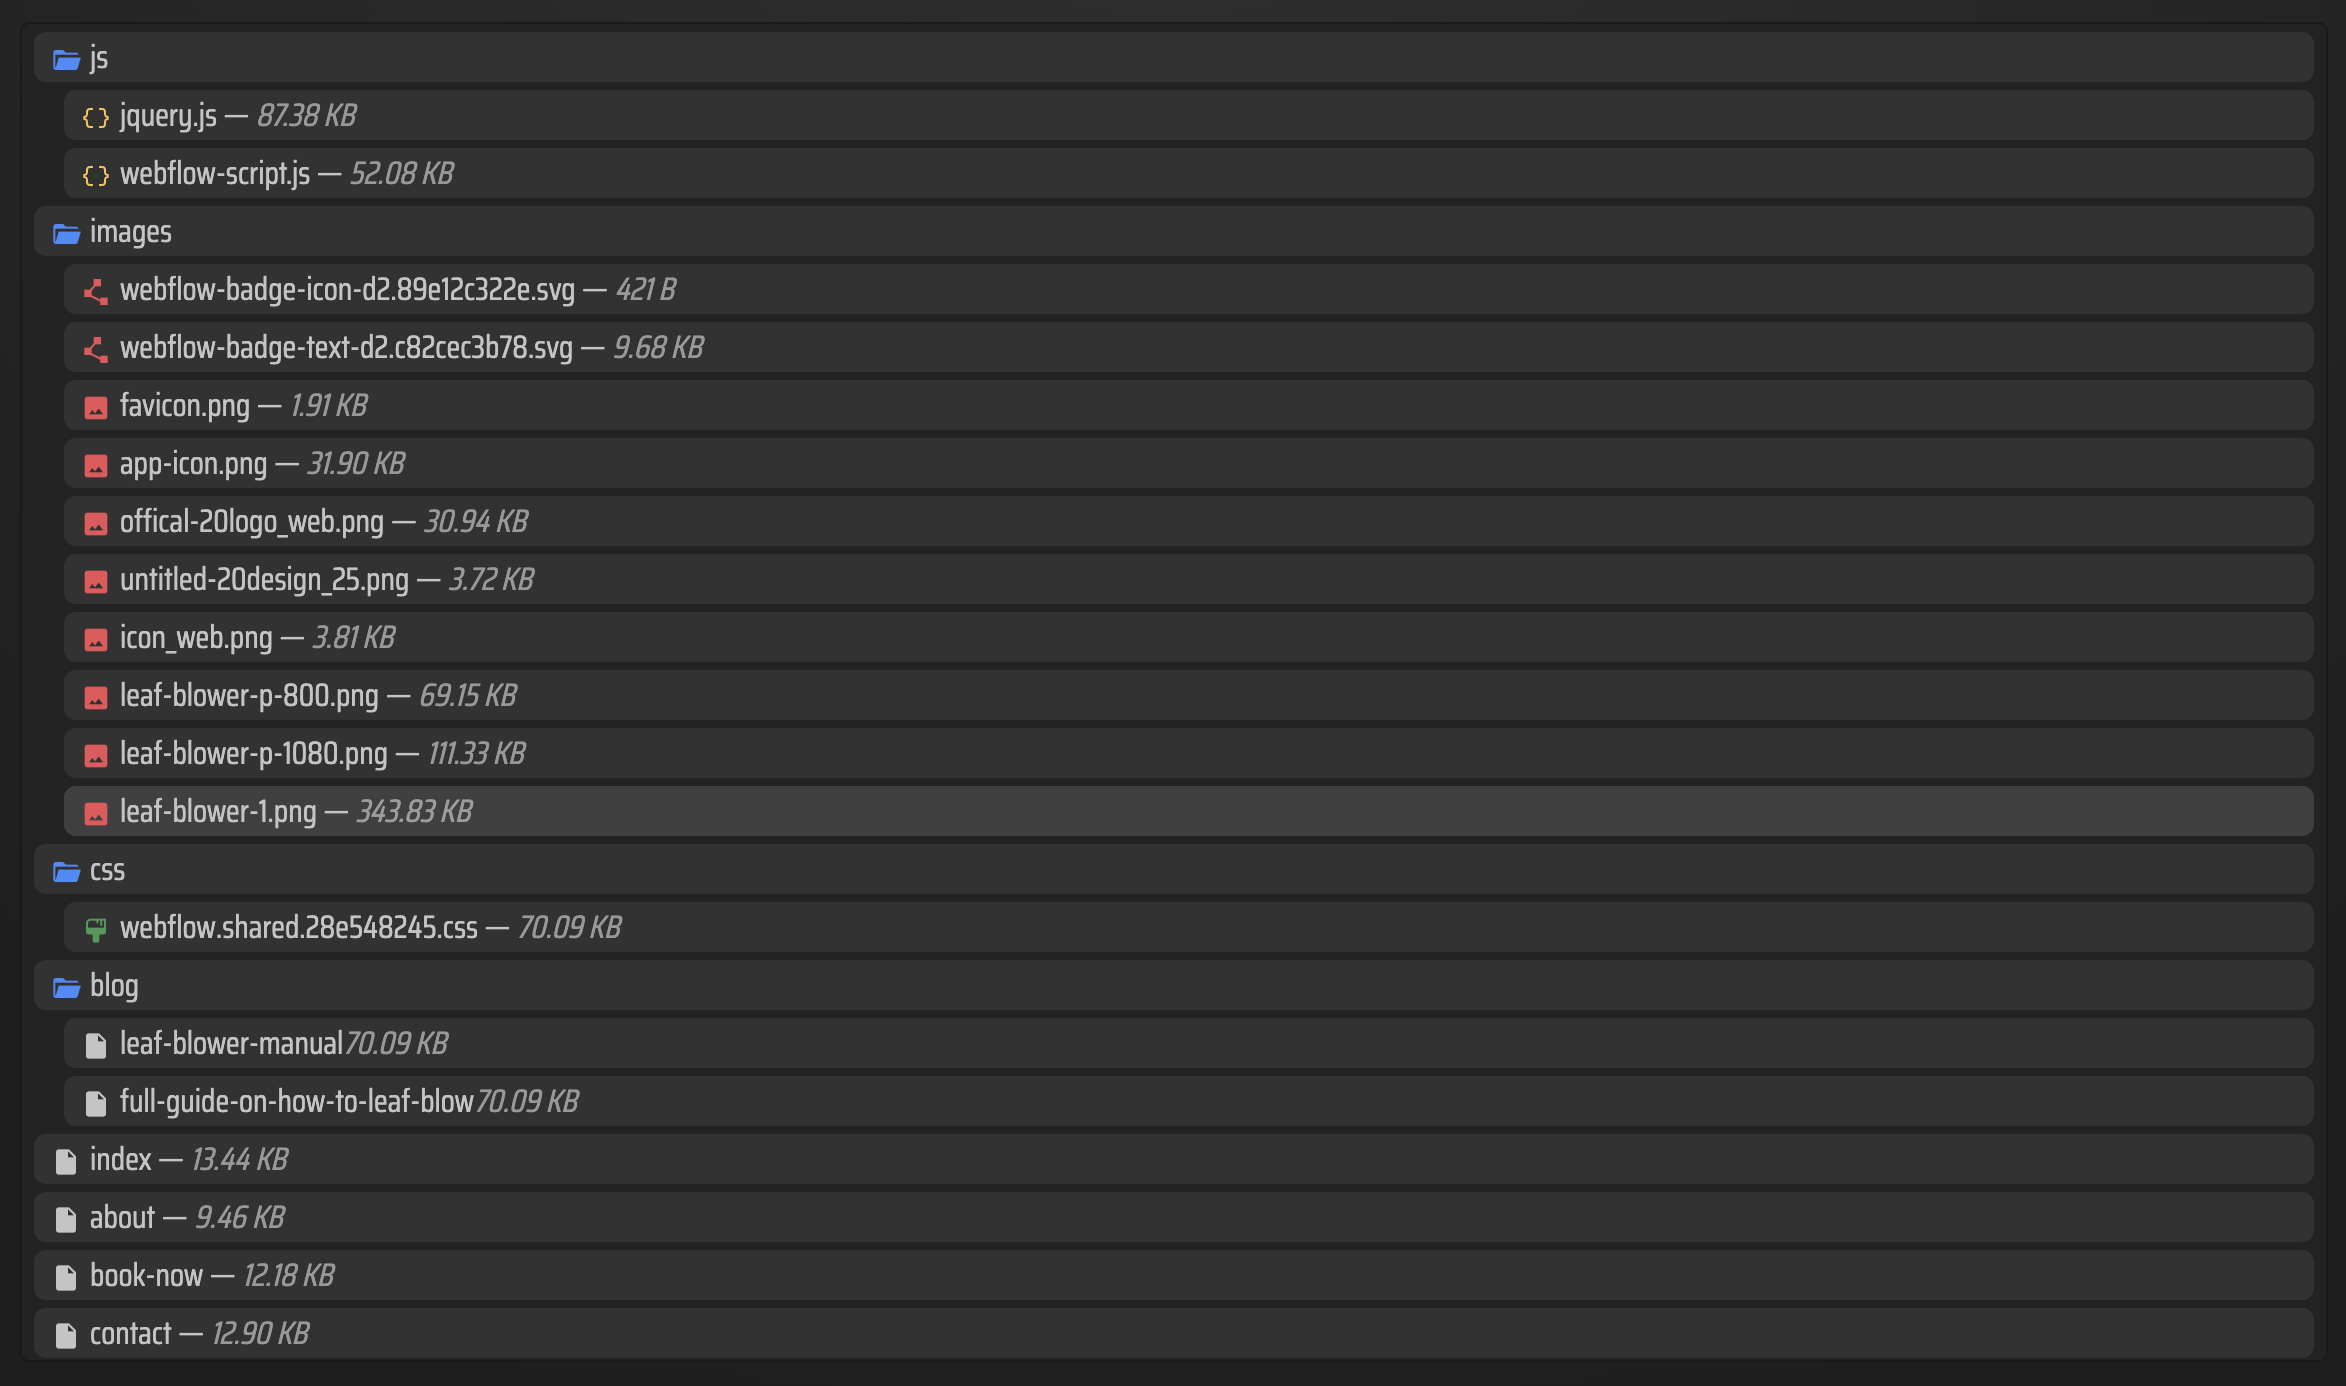
2. Export The Site And Check The Output
Run the export and inspect the result before you publish anything. The point here is not just to see files in a folder. It is to confirm that the site still behaves like the Webflow version:
- Open a CMS page and confirm the HTML file exists
- Check that images load from local paths
- Confirm CSS and JS files are present
- Verify internal links resolve to exported .html pages
- Make sure any custom script or stylesheet is where you expected it
This is the step that catches most problems early. If the export looks fine locally, GitHub Pages becomes a deployment problem instead of a debugging problem.
3. Put The Export In A GitHub Pages Repo
You have two practical options here.
If you use ExFlow Git Sync, point it at the repository and branch that GitHub Pages will serve. That is the cleanest choice when you know this site will stay static.
If you are doing it manually, copy the exported files into the repository branch or folder that Pages reads. A common setup is:
- main branch, repo root
- gh-pages branch, repo root
- main branch, /docs folder
The important part is not the exact branch name. It is that the exported files are the actual site content, not buried in a nested folder that Pages cannot serve without extra setup.
GitHub Pages
Source: Deploy from a branch
Branch: main
Folder: /(root)

4. Turn On GitHub Pages And Verify The Live Site
Once the repo contains the exported files, go to your repository settings and enable Pages for the branch or folder you chose. Then wait for the build to finish.
When the live site is up, check the pages that usually break first:
- A CMS listing page
- A CMS detail page
- Any page with a custom script
- Any page with a large image or embedded media
If something is wrong, it is usually one of three things:
- A missing asset in the export
- An absolute path that should have been relative
- A file that should have been .html but was not deployed where Pages expects it
That is why ExFlow’s export settings matter so much. The better the bundle, the less you need to fix after deployment.
5. Use ExFlow For The Right Kind Of Migration
For a simple static handoff, ExFlow is a better fit than a generic downloader because it is aimed at Webflow exports, not just page scraping. That matters when you need CMS pages, styles, scripts, and media to survive the move.
If you want a shorter export checklist, keep Webflow CMS to HTML: A Practical Export and Self-Hosting Checklist nearby. If you are moving the same idea to a different builder, the same pattern also applies in How to Export a Squarespace Site to HTML and Host It Yourself and How to Download a Framer Site as HTML and Self-Host It. And if you specifically want the Pages migration angle, see How to Move a Webflow Site to GitHub Pages with ExFlow.
Troubleshooting
If the homepage loads but inner CMS pages 404, check whether those pages were exported as .html files and whether Pages is serving the right folder.
If CSS is missing, confirm that you exported the CSS files and that the HTML references point to the deployed paths, not a local filesystem path.
If images are broken, re-run the export with images and media enabled and make sure the uploaded assets actually made it into the repository.
If the site looks right locally but wrong on GitHub Pages, clear out any stale published files and redeploy the branch cleanly.
Conclusion
The safest way to host a Webflow CMS site on GitHub Pages is to treat the export like a release artifact. Export everything you need, inspect the bundle, then publish the static files as-is.
Start with one page, verify the assets and links, then push the full site once you trust the export.