
July 14, 2026
How to Self-Host a Webflow CMS Site Without Rebuilding It
A practical workflow for exporting a Webflow site, checking the bundle, and hosting it on GitHub Pages, S3, FTP, or ExFlow.

If you want to move a Webflow site onto static hosting without rebuilding it, the cleanest path is simple: export the site, verify the bundle, then deploy it somewhere you control. ExFlow is built for that workflow, so you can export Webflow sites as static content and sync them to Git, S3, FTP, or ExFlow hosting.
Webflow’s export glossary gives a concise definition of the package. If you are trying to keep a CMS-driven site portable, the important part is checking the output before you commit to a host.

1. Decide what has to survive export
Start by separating pages that are truly static from the ones that depend on CMS or other live behavior. That decision tells you whether a static copy is a clean fit or just a temporary snapshot.
If the site is mostly marketing pages, docs, or landing pages, export and static hosting are usually straightforward. If the site leans on CMS content, plan the export around that content before you move anything.
Expected result: you know whether you are moving a full site or only the parts that can behave well as static files.
2. Export with the right settings
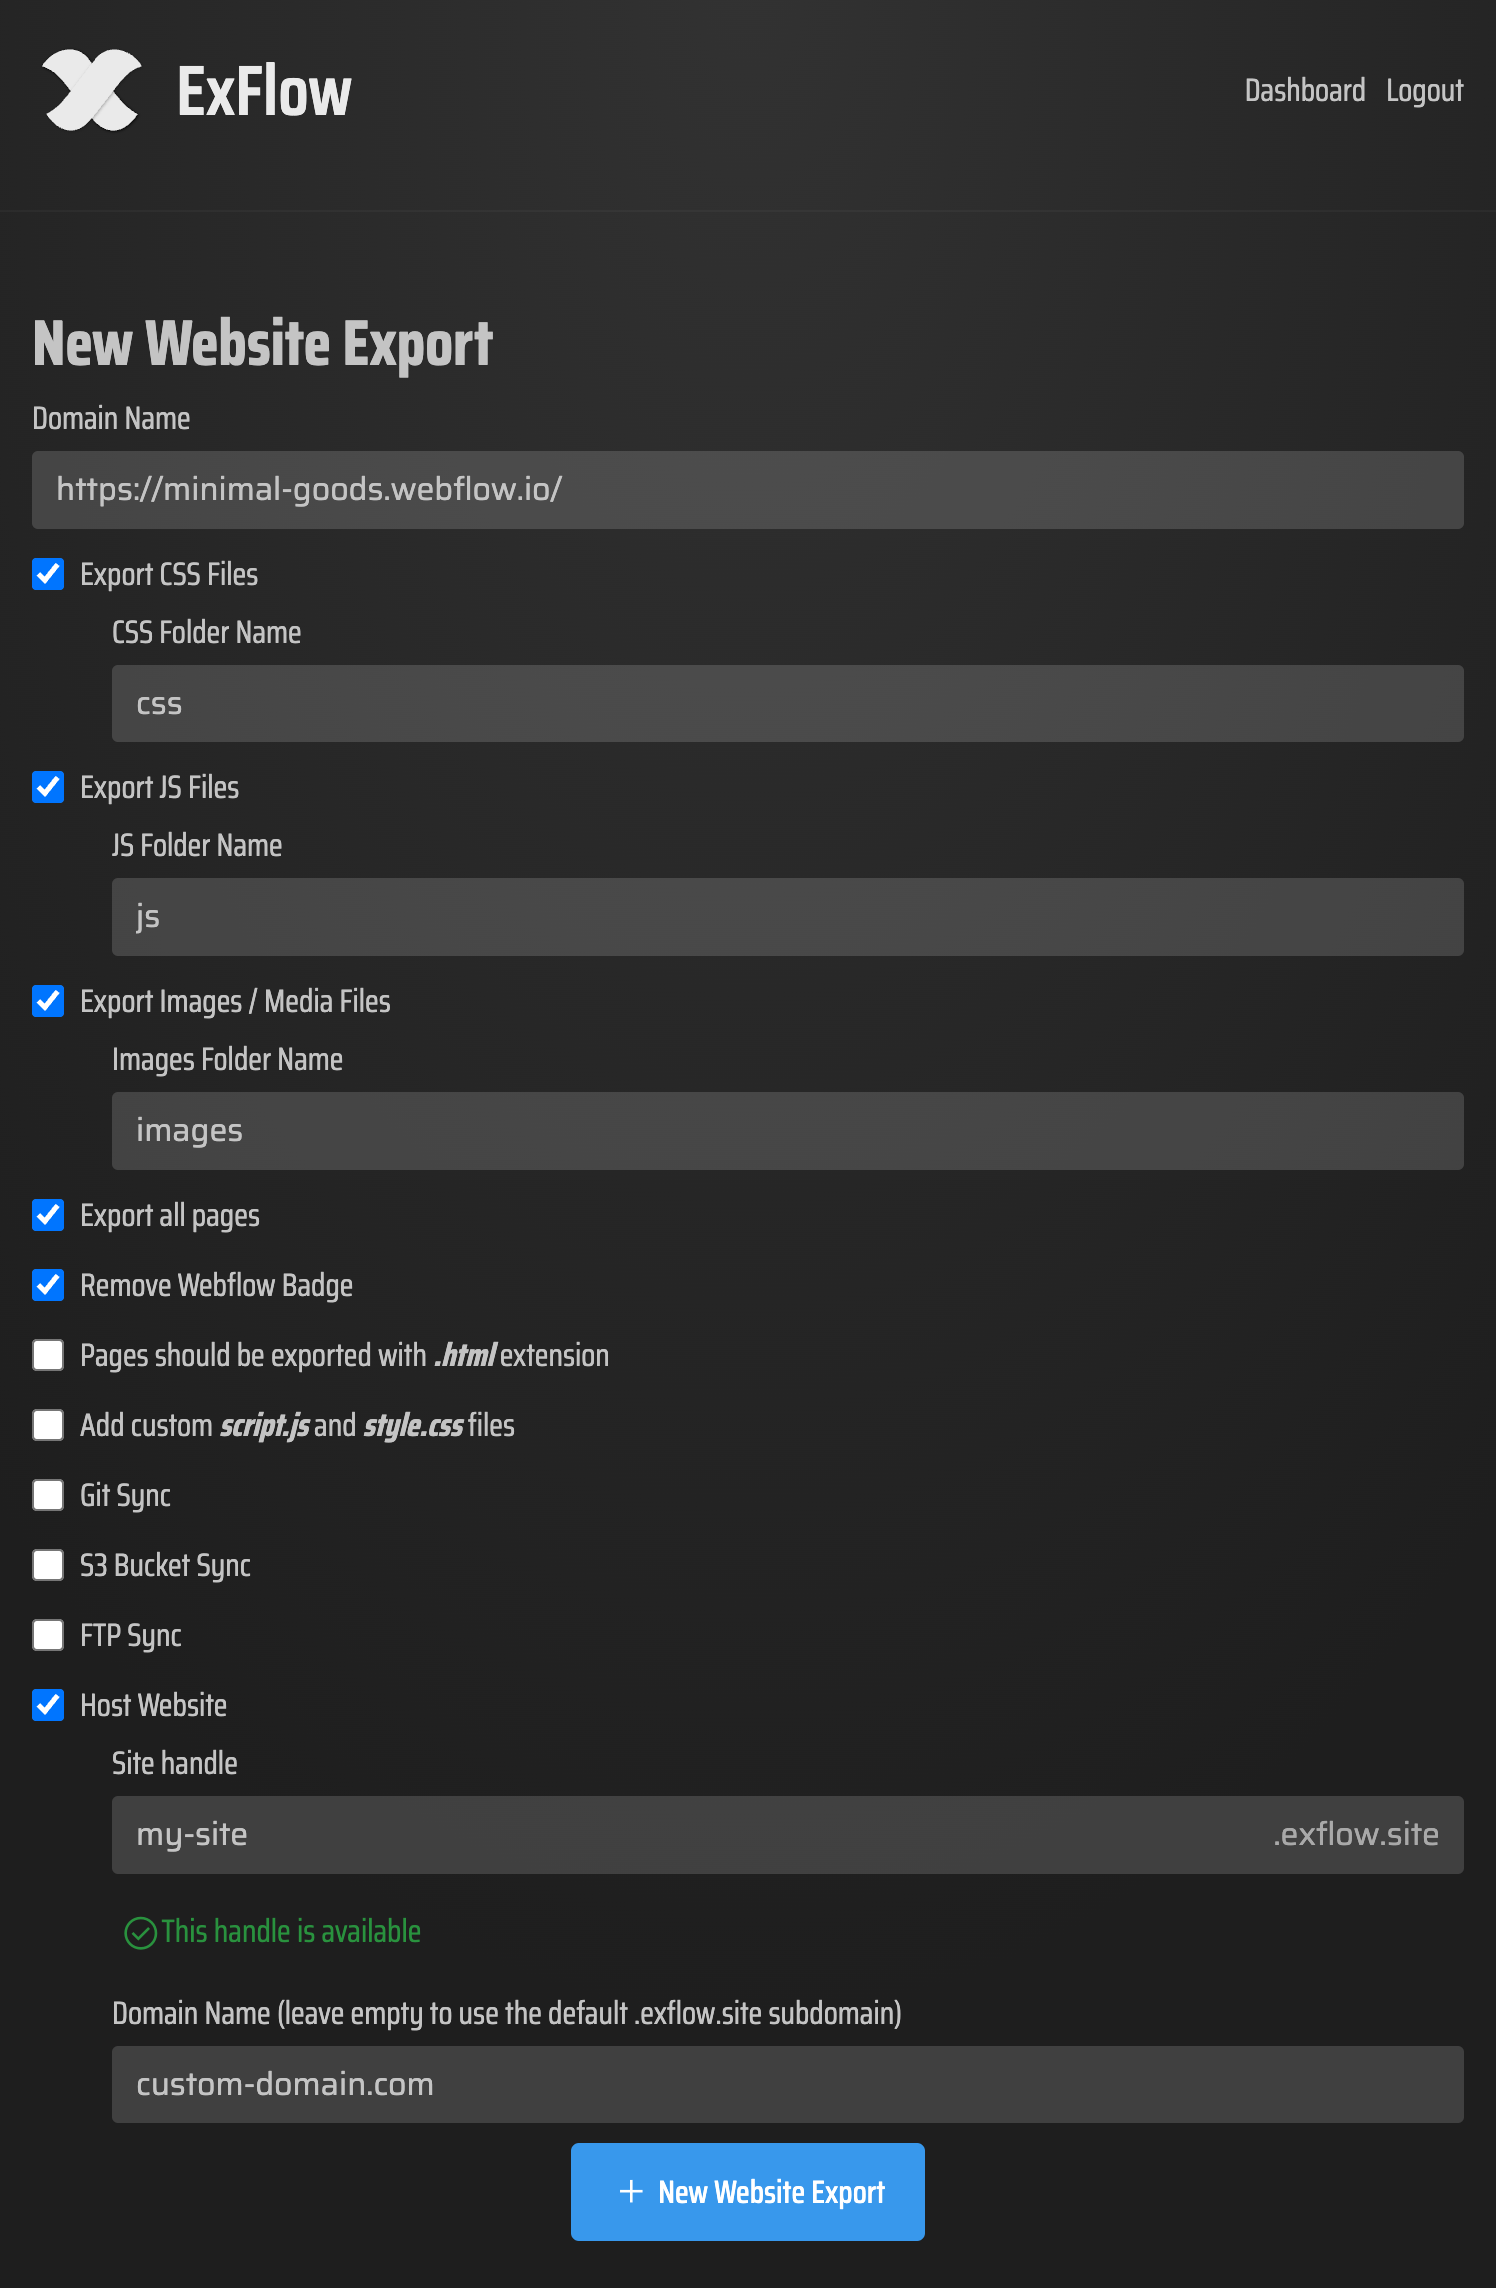
In ExFlow, enter the site URL and switch on the pieces you need: CSS files, JS files, images or media files, and all pages. If you want a cleaner handoff, remove the Made with Webflow badge. If you need small custom behaviors after export, add your own script.js and style.css files before you publish the bundle.
Expected result: you get a downloadable static bundle that includes page files and assets you can host elsewhere.
3. Review the bundle before you host it
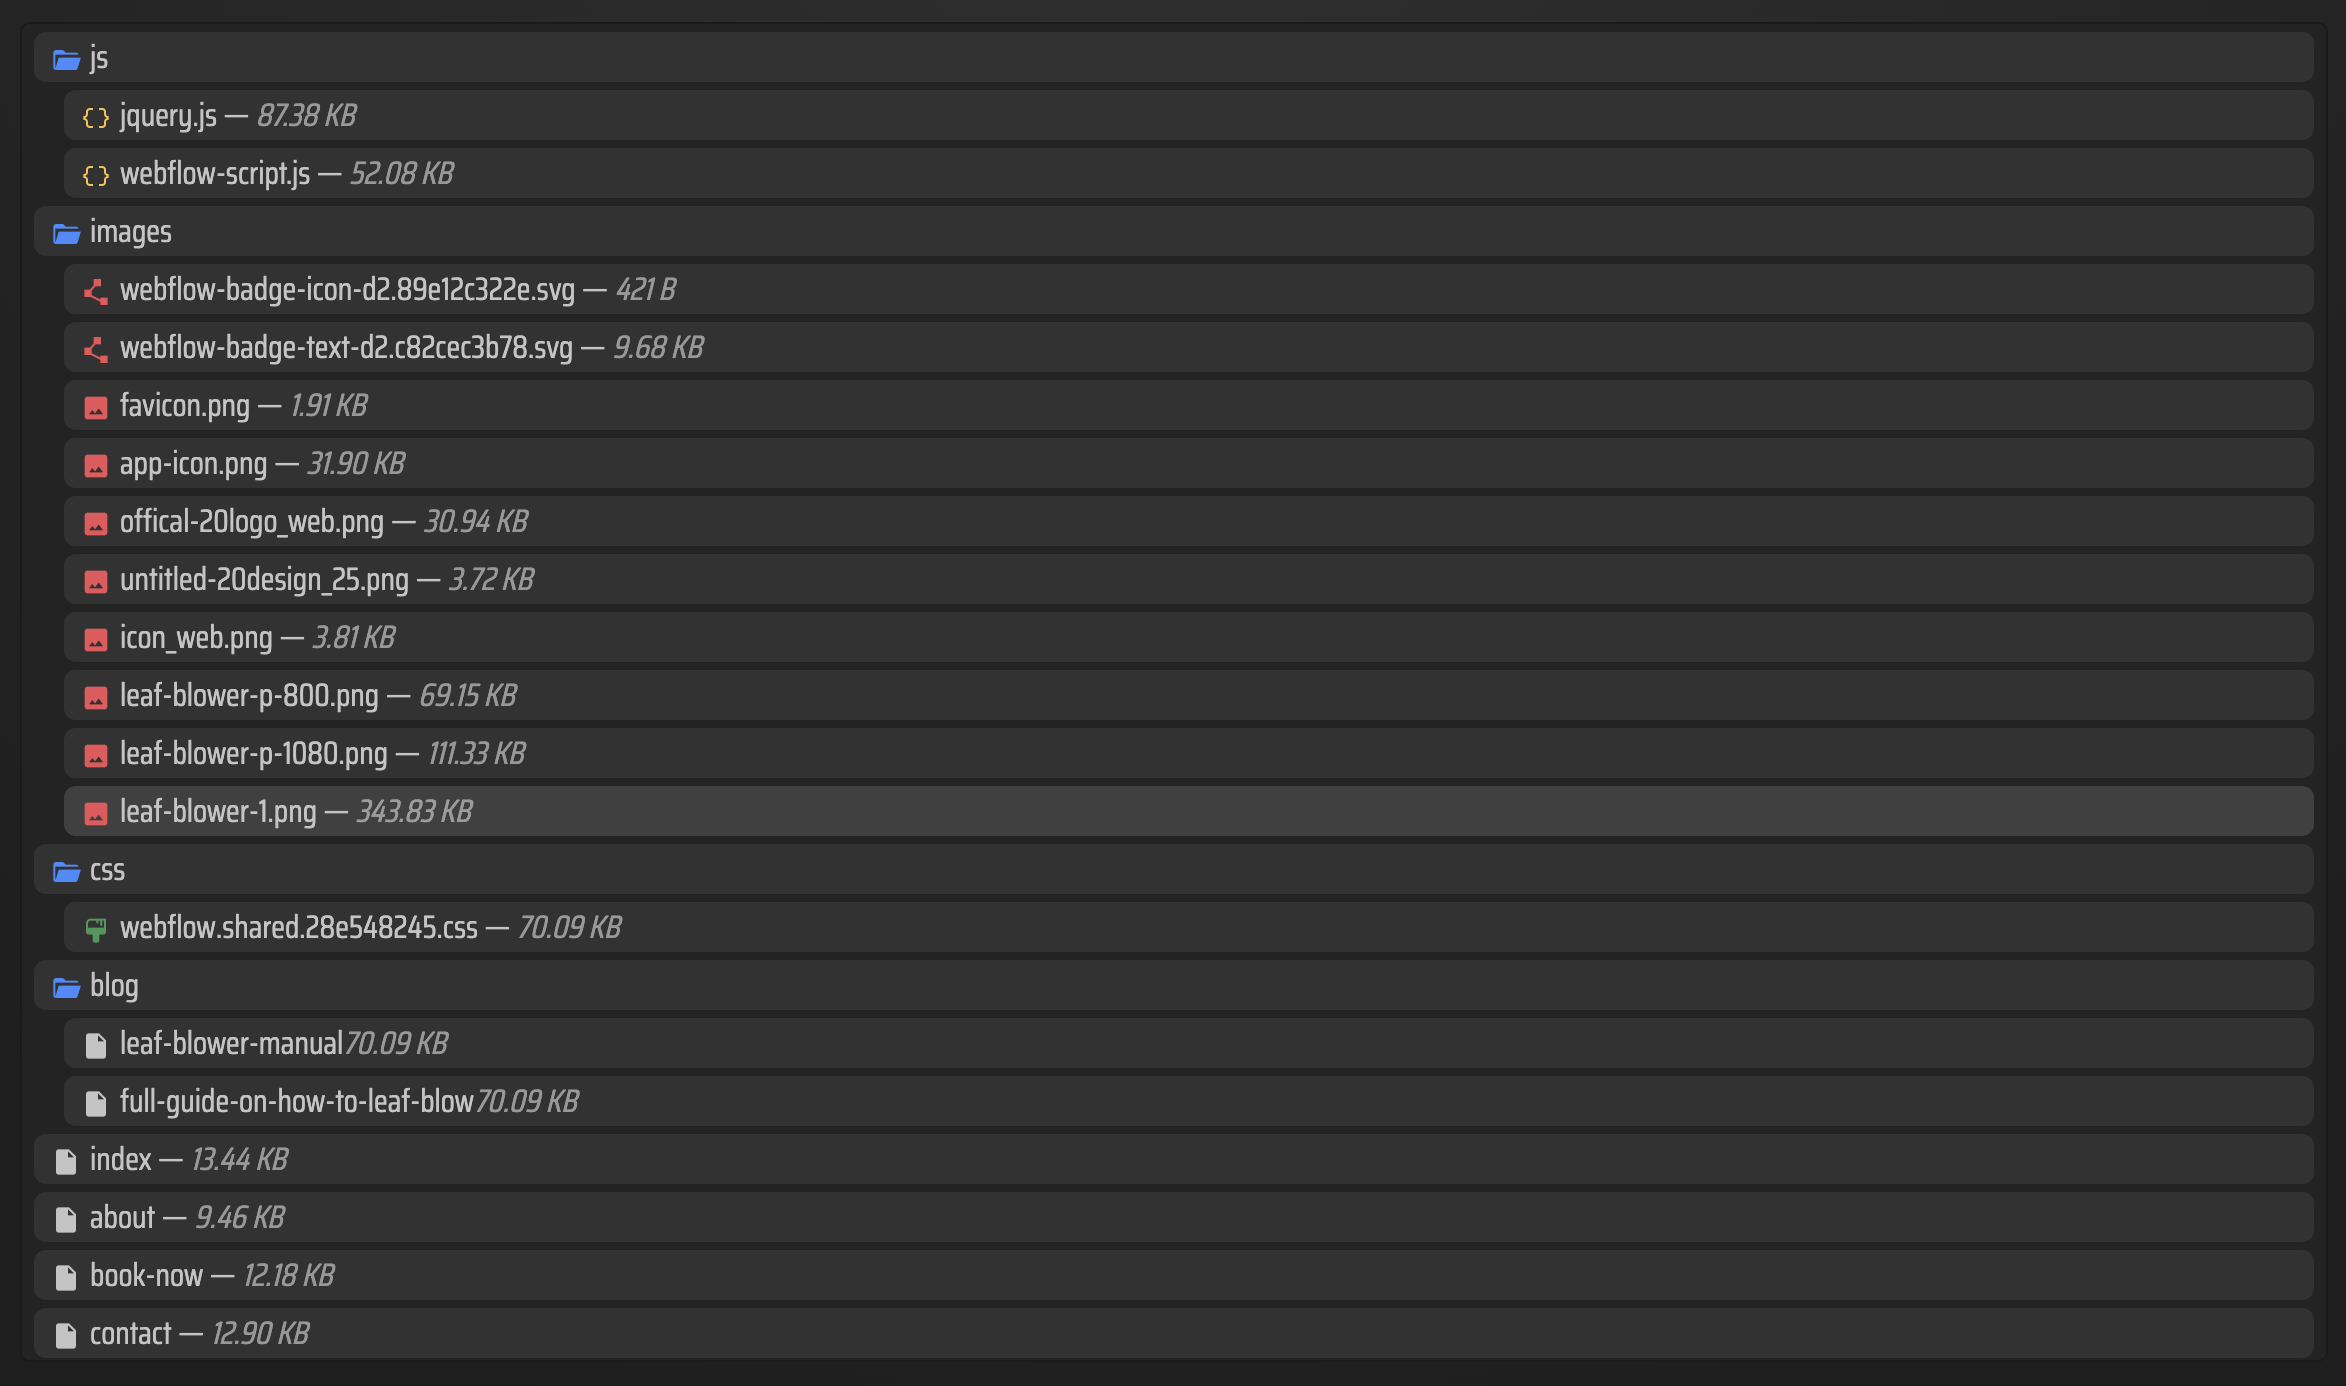
Open the exported files and confirm the structure looks right. You should see a separate HTML file per page, plus the supporting CSS, JS, and media assets. For CMS-heavy sites, this is the moment to check whether the exported pages still make sense as static pages.
If something looks off here, fix it before you upload. It is faster to adjust the export settings than to debug a broken deployment later.
Expected result: a bundle that looks like a real static site instead of a half-finished export.
4. Pick the simplest place to host it
GitHub Pages is the lowest-friction choice if you already keep the site in a repo. S3 is a good fit when you want cheap static hosting with predictable scaling. FTP is still fine if you are maintaining an existing server. ExFlow hosting is the least moving parts if you want the exporter and host in the same place.
The practical choice is the one your team will actually keep using. If updates are rare, use the simplest host. If you expect repeated edits, pick the path that makes re-exporting boring.
Expected result: you have one destination, not four half-decided options.

5. Turn it into a repeatable update loop
The real win is not a single export. It is a process you can repeat: make the Webflow change, export again, check the bundle, sync it, and confirm the live URL. That keeps the site portable without forcing you back into a rebuild.
If you want a companion checklist, compare this with How I Self-Host a Webflow Site After Exporting CMS Content, How to Export a Webflow CMS Site to GitHub Pages Without Rebuilding It, How I Exported My Webflow CMS Site to Static Hosting Without Rebuilding It, and How I Export a Webflow CMS Site to Static HTML Without Rebuilding It.
Bottom line
If your goal is to keep Webflow design flexibility but own the hosting layer, ExFlow gives you the cleanest path: export, review, host. Start with one site, confirm the result, then standardize the workflow for the rest of your builds.
If you are ready to test it, try ExFlow.site on one Webflow project and use the first export as your template for every future handoff.