
August 23, 2026
How to Build a Shopify Product Photo QA Checklist Before Launch
Create a repeatable Shopify product-photo QA checklist for clean, consistent images before you publish a collection.

Your product photos are often the last thing a shopper sees before deciding whether to add to cart. A polished image can still create doubt if the crop changes from variant to variant, the background feels accidental, or a generated lifestyle scene changes what the item actually looks like.
This guide shows you how to build a practical pre-launch QA checklist with Supra AI Photo Studio. You need a Shopify product with at least one clear source photo, a short list of approved brand settings, and permission to update the product’s media. The goal is not to make every image identical; it is to make every image trustworthy and ready to publish.
1. Choose the source photo and define the job
Start in Shopify and select the product image that best represents the real item. Prefer a sharp, well-lit image where the entire product is visible. For clothing, make sure the garment shape, color, and key details are clear. For objects, avoid source shots with reflections, clutter, or crops that hide important features.
Before opening an editor, write one sentence for the image’s job: main product image, detail image, lifestyle image, or ad creative. That decision keeps you from using a lifestyle treatment where a clear catalog image belongs. If the source has a distracting background, plan to isolate it first rather than asking a scene generator to guess its edges.
Expected result: you have one source image, one intended use, and a clear reason for the edit. If you cannot say what the image is supposed to help a shopper understand, keep it out of the batch.
2. Open the product in Supra and clean the fundamentals
Install or open Supra AI Photo Studio from Shopify, then choose the product or upload the approved source image. The editor gives you a tool area, canvas, and image gallery so you can work on the selected asset without losing track of the rest of the product media.
Run only the fixes the source needs: background removal or replacement, resolution improvement, and lighting or color cleanup. Zoom in before moving on. Check edges, transparent areas, product labels, stitching, and reflective surfaces. If an enhancement changes a factual product detail, undo it and use a lighter treatment.
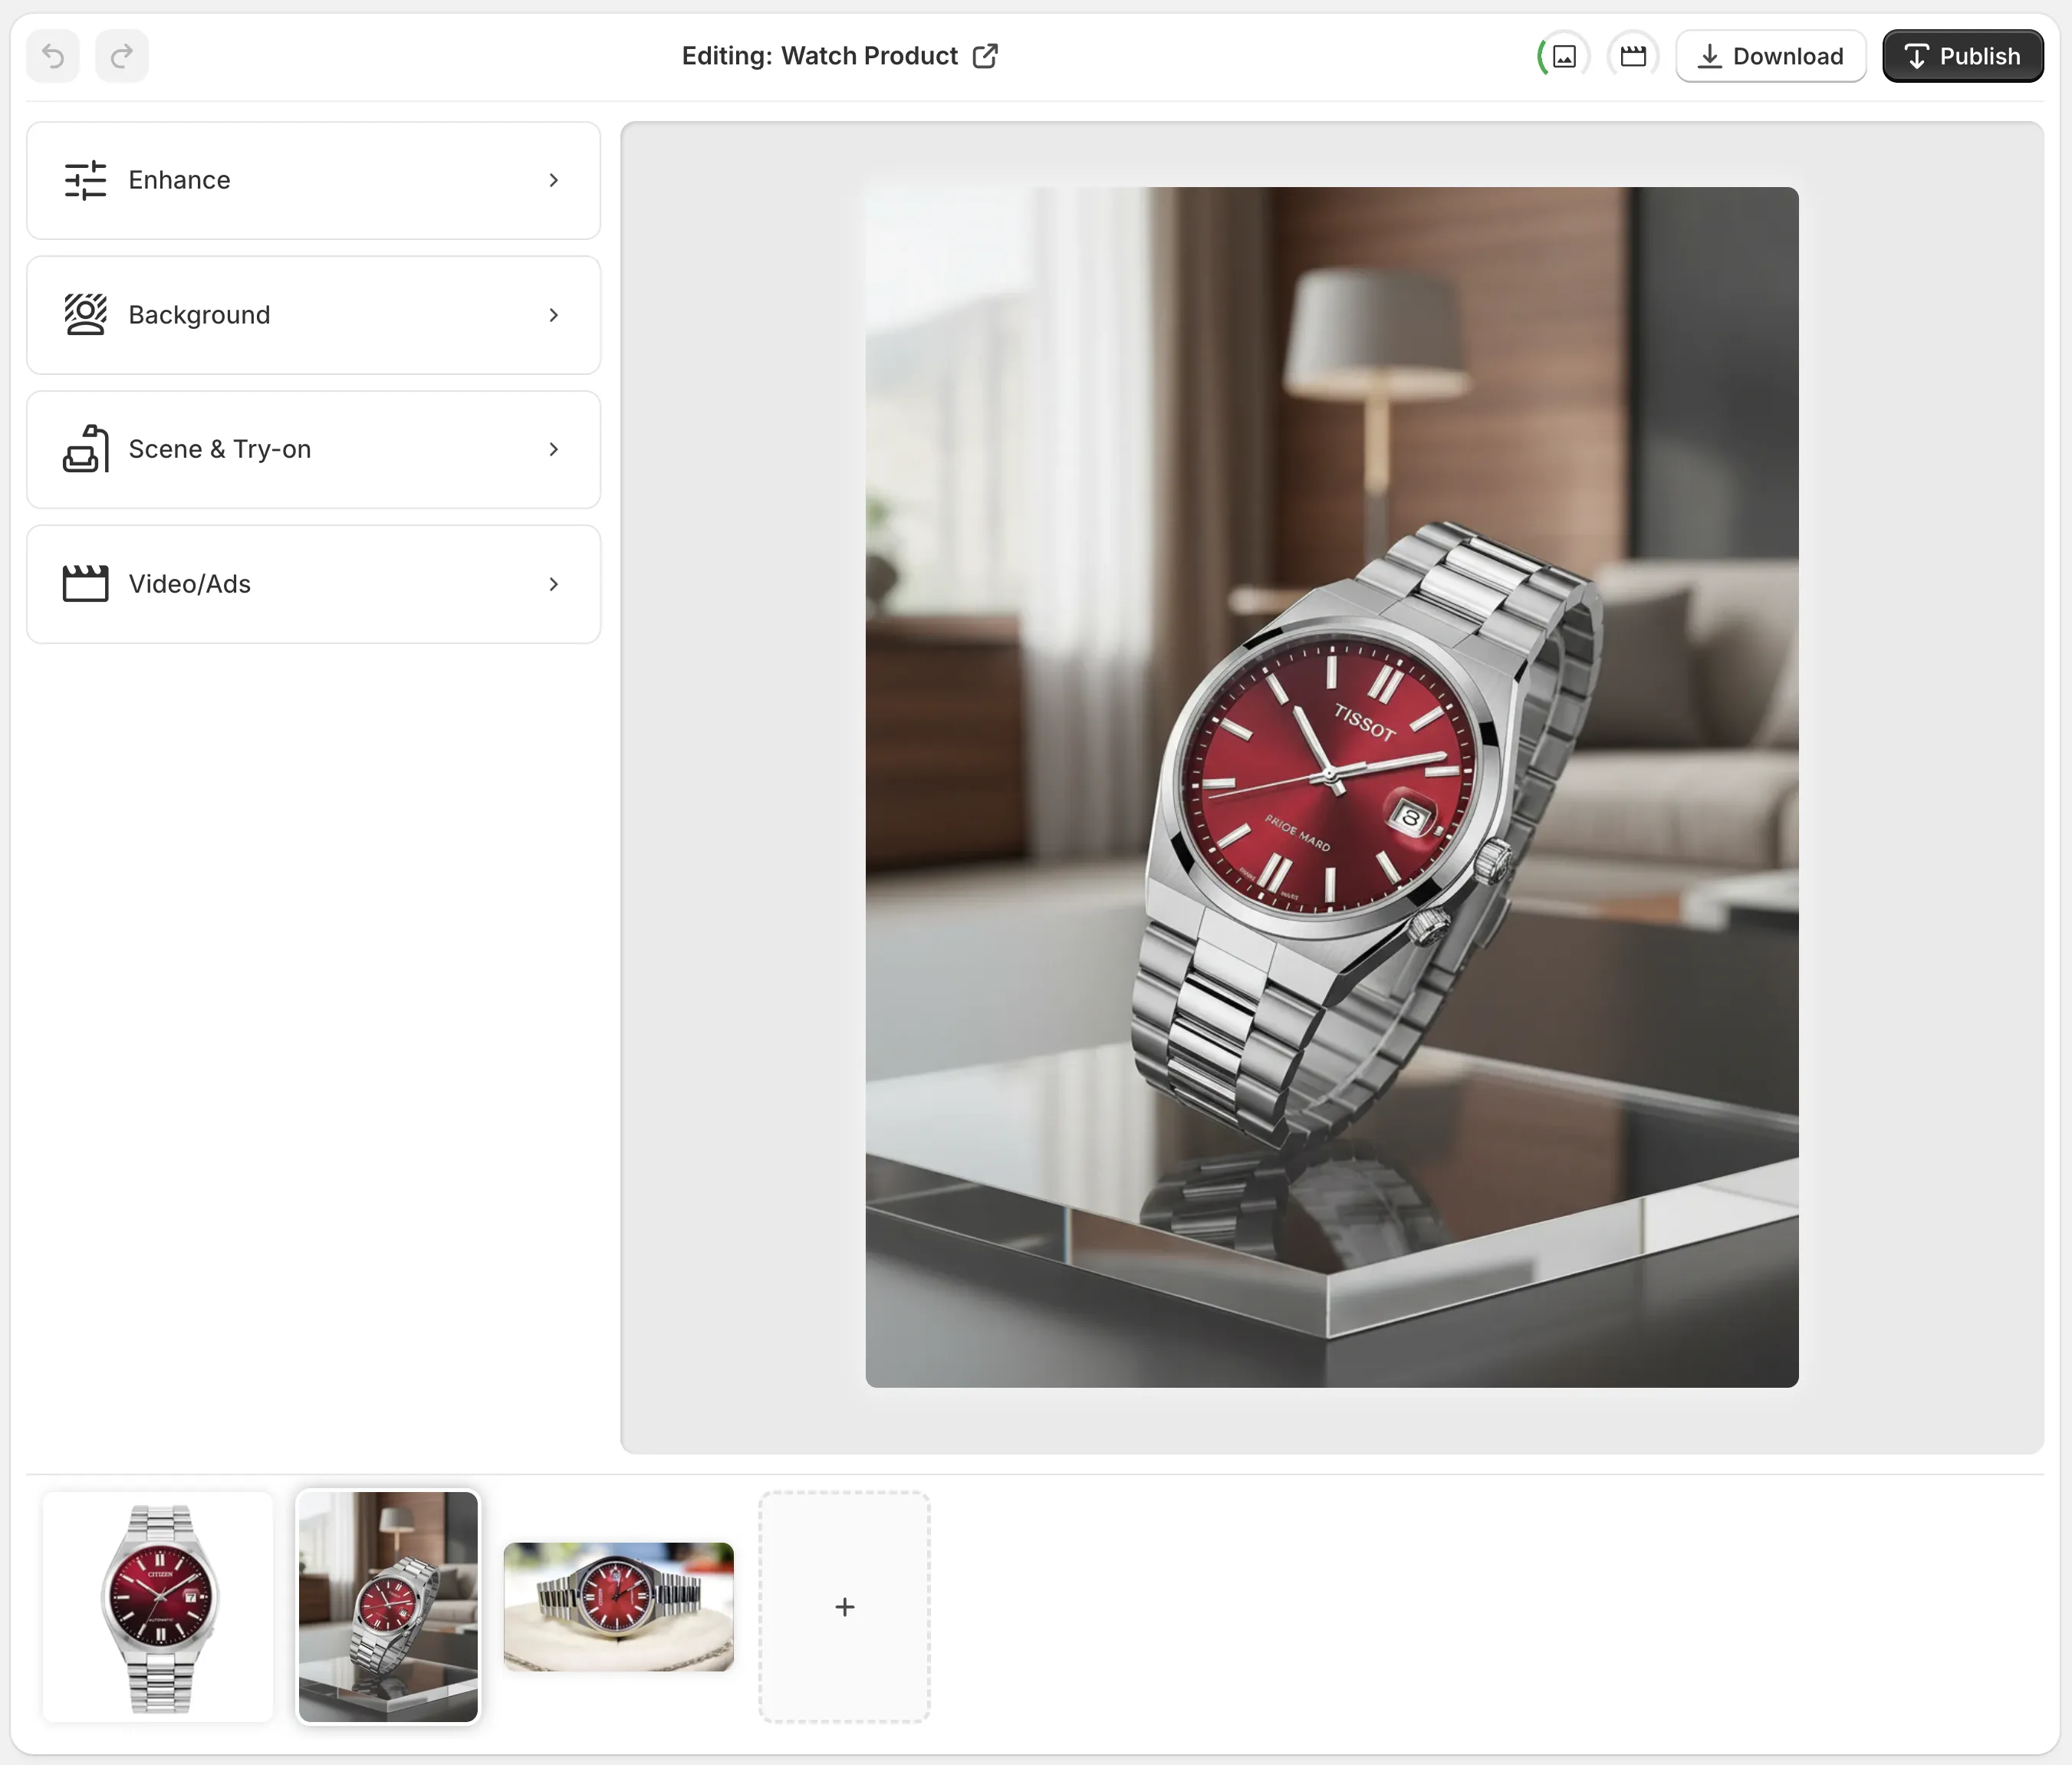
Expected result: the image is cleaner than the source while the product remains recognizably the same item. This is the right moment to use the same safe cleanup sequence across a collection; this guide to making Shopify product photos consistent explains why consistent lighting and framing matter more than a one-off dramatic edit.
3. Add lifestyle context only when it helps the buying decision
Use object placement for products that benefit from scale or context: home goods in a room, cosmetics on a vanity, or accessories in a relevant setting. For apparel, use virtual try-on only after you have a clean product image. Give the tool concrete direction about environment, surface, camera angle, and lighting. Keep the prompt focused on the setting, not invented product claims.
For example, a candle could belong on a dark stone shelf in soft window light. The prompt should not introduce an extra label, a new lid, or a different colorway. Generate a small set, then compare each result against the original product image at normal product-page size and at a close zoom.
If your task is simply to remove the scene around the item, follow the narrower workflow in How to Replace a Shopify Product Background Without Changing the Product rather than generating a full lifestyle image.
Expected result: the scene adds useful context without becoming the subject. The item’s silhouette, material, color, and meaningful details still match the real product.
4. Run the four checks before publishing
Use the same four checks for every final image:
- Accuracy: Compare the generated result side by side with the source. Product color, shape, logo placement, fabric pattern, and included parts must remain correct.
- Legibility: At the product-page crop, can a shopper see the item and any essential packaging detail? Reject images where glow, props, or a busy setting compete with it.
- Consistency: Compare the image with the first three assets in the gallery. Check crop, background tone, lighting direction, and visual weight. A storefront looks more considered when the first screen of media belongs together.
- Purpose: Confirm that the image earns its place. A main image should explain the item; a detail image should answer a question; a lifestyle image should make scale or use clearer.

Expected result: every image passes a simple yes/no gate. When a result is nearly right, do not publish it anyway—either make a targeted revision or return to the source. The same review-first habit is useful in a Shopify photo decision system and in planning a consistent launch photo batch.
5. Publish in a deliberate order
Keep your clearest product image first in Shopify. Place detail shots next, then lifestyle images and campaign-oriented variations. Download approved assets or publish changes from the editor only after the checklist passes. Then open the product page on desktop and mobile, inspect the first media frame, and switch variants if the product has them.
For a repeatable release process, save the four checks in your launch checklist and assign one person to approve the first SKU before the rest of the collection goes live. That small gate catches style drift early and makes later batches faster to review.
Common pitfalls
- Treating a generated scene as proof of a feature. Keep descriptions and images grounded in what the product actually includes.
- Fixing color without checking variants. A warmer or cooler treatment may be visually attractive but misleading beside another colorway.
- Publishing the strongest-looking image first. Put the clearest, most accurate explanation of the item first; use creative context afterward.
- Skipping the mobile check. A wide lifestyle image can lose the product entirely in a small crop.
Supra AI Photo Studio can help with cleanup, background work, lifestyle placement, virtual try-on, and short visual content, but the publish decision still benefits from a simple human checklist. Start with one representative product today, run these five steps, and use the approved result as the reference for the rest of the launch.