June 12, 2026
How to Capture a Shopify Product in 3D Without a Studio
A practical Shopify 3D capture workflow: prep the product, shoot with a phone, process to GLB, and publish native 3D media without a studio.
How to Capture a Shopify Product in 3D Without a Studio
If you want an interactive 3D model on a Shopify product page but you do not have a studio, a 3D artist, or specialized equipment, you can still build a practical workflow with a phone. Supra 3D Capture is built for exactly that kind of setup: guided phone photos in, web-ready GLB out, then publish to Shopify as native 3D media or place it with the Online Store 2.0 theme app block.
The key is to treat 3D capture like any other product-content workflow. Start with the right SKU, control the light, capture enough overlap, and review the output before you publish. That is how you avoid the “cool demo, weak product page” problem.
1. Pick a product that will actually benefit from 3D
If you have not decided which SKU to scan first, start with the product that gains the most from shape, depth, or texture being visible from every angle. The best candidates are usually items customers would normally rotate in their hands before buying: bags, small accessories, home decor, footwear, electronics, bottles, or anything where proportion matters.
If you still need a prioritization framework, use the checklist in How to Decide Which Shopify Products Deserve 3D Models First.
Expected result: you choose a product with enough visual payoff to justify the extra capture step.
2. Set up a simple, controlled capture space
You do not need a studio build-out. You do need consistency. Pick a spot with soft, even light, a clean background, and enough room to move around the product without casting hard shadows. Keep the product still. Avoid reflective clutter near the item. If your source photos are already part of a broader image workflow, this preparation fits naturally beside How to Build a Repeatable Shopify Image Workflow From One Product Shot and How I Build a Shopify Visual System From One Product Photo.
Expected result: every photo has the same exposure, background, and general angle family.
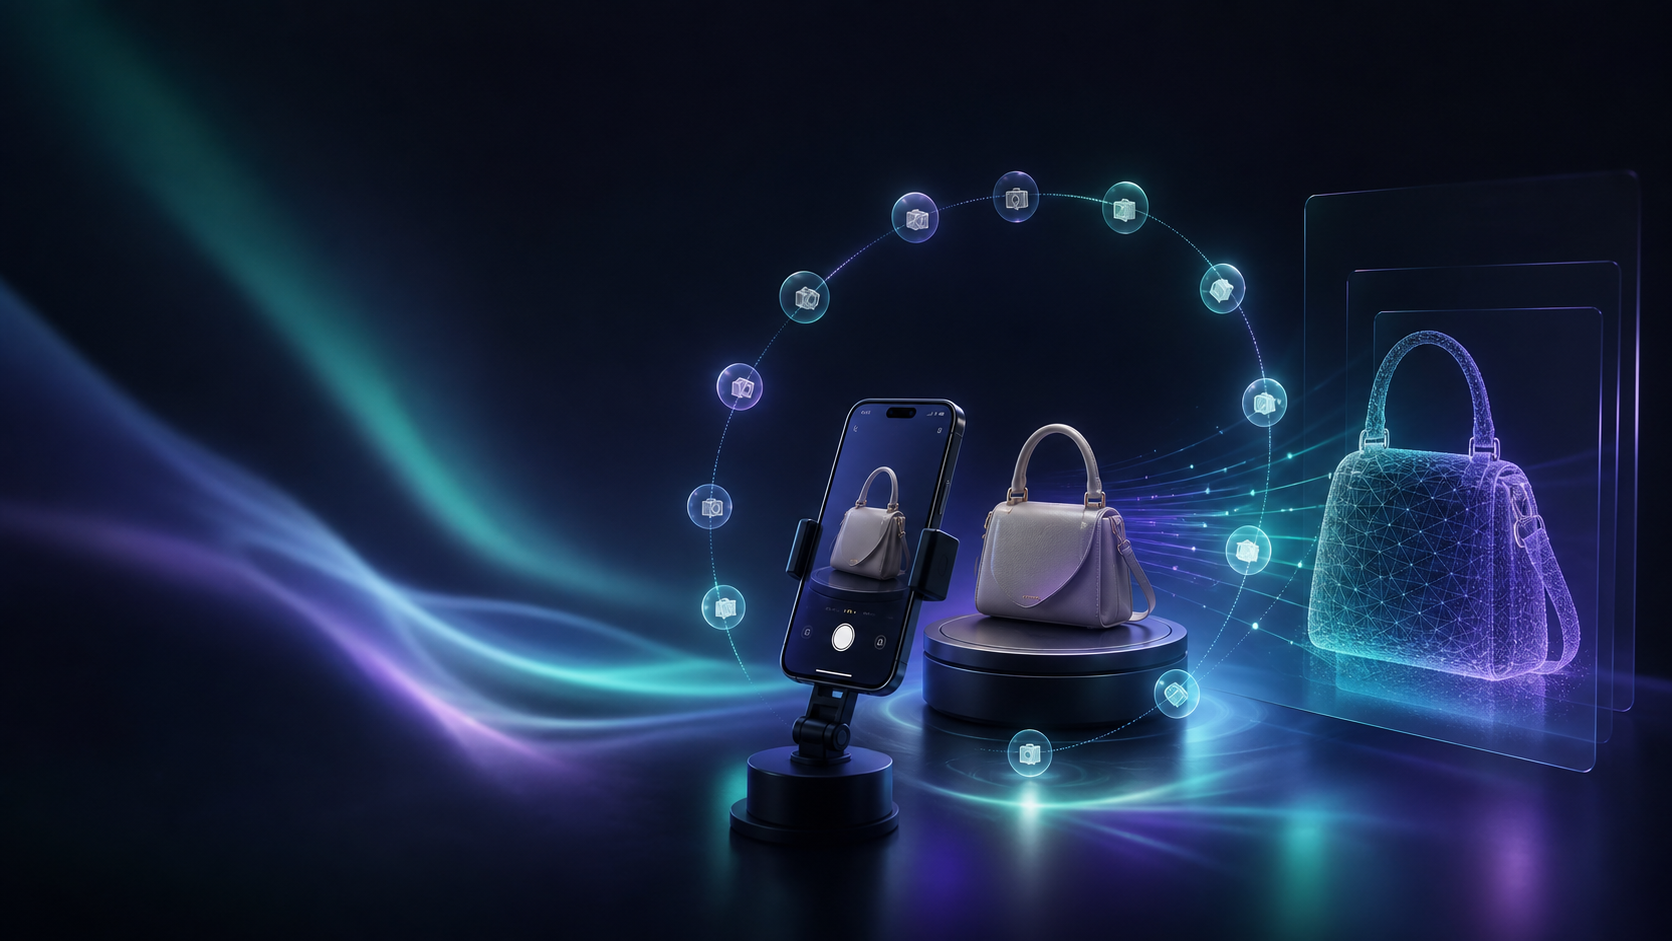
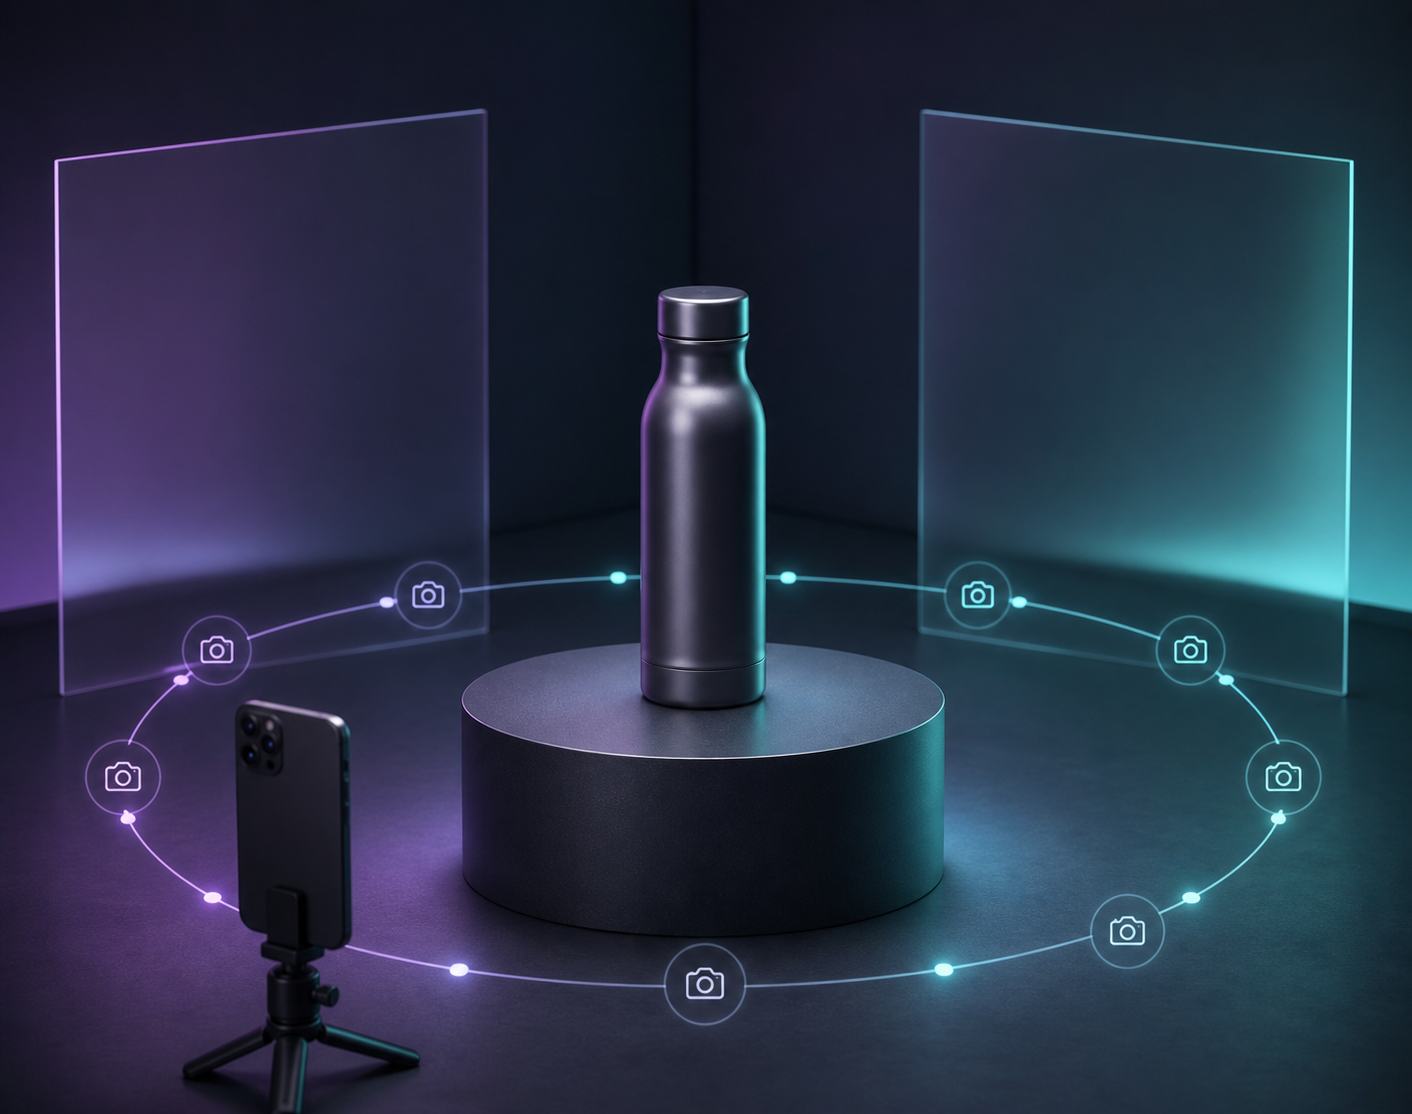
3. Capture the orbit with your phone
Open the guided capture flow on your phone and move around the product in a smooth circle. Think in terms of overlap, not random snapshots. You want the camera to see the same surface from neighboring angles so the reconstruction has enough information to work with.
A 10-photo orbit is the minimum useful starting point, not the final target. More coverage is better when the product has curves, cutouts, seams, or highly visible texture. Shoot from slightly above, eye level, and slightly below if the shape needs it. Keep focus locked, avoid motion blur, and do not change lighting mid-run.

Expected result: you have a coherent set of sharp photos that all describe the same object from different angles.
4. Process the photos into a clean GLB
Once the capture set is uploaded, Supra 3D Capture runs the photogrammetry pipeline and reconstructs a web-ready model. This is the step where loose photos become a model you can inspect, refine, and publish. Treat the output like any other production asset: check the silhouette, the surface continuity, and the overall realism before you send it live.
If you already think in terms of reusable media systems, this stage is close to what happens in How I Turn One Product Photo Into a Shopify Asset Pipeline.
Expected result: you get a usable GLB that is ready for a Shopify product page.
5. Publish the model where shoppers will see it
Attach the model to the product in Shopify so it shows up in the native 3D viewer when the theme supports it. If your theme uses an Online Store 2.0 app block, place the model there so it is part of the page layout instead of hidden off to the side. The goal is not to add another novelty widget. The goal is to make the product easier to understand at the moment of purchase.
Save as draft if you want review first, or publish immediately if the model is ready. That flexibility matters when the product is high-value or the scan needs one more pass.
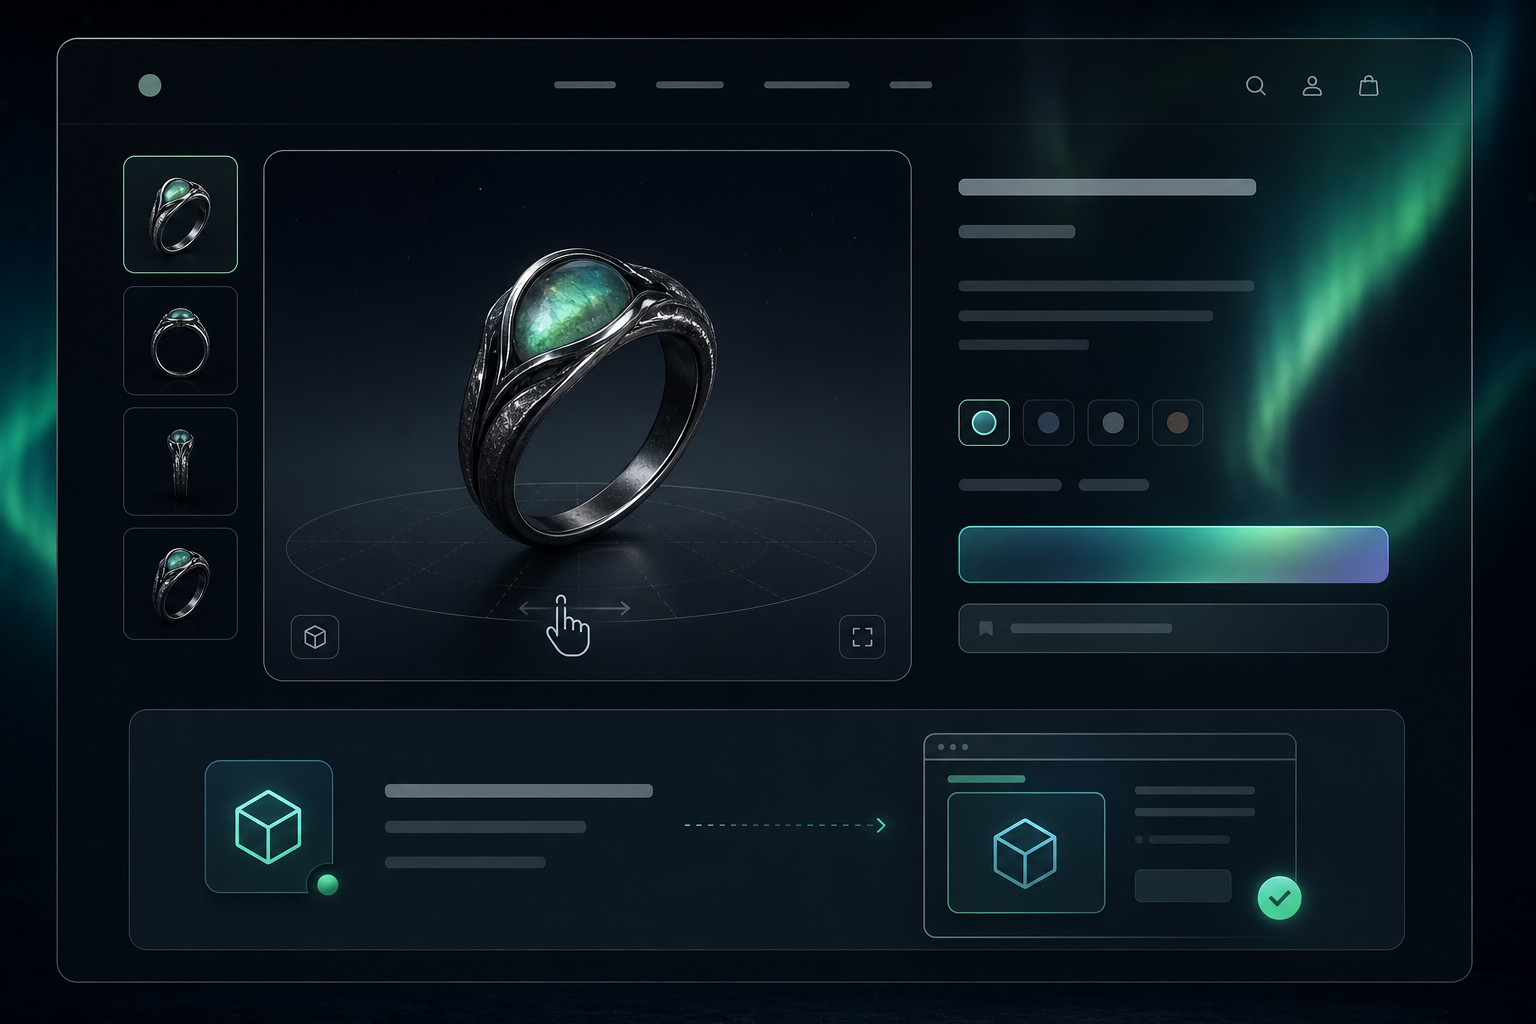
Expected result: shoppers can rotate the product directly on the product page instead of guessing from a flat gallery.
6. QA the model before you rely on it
Do one quick pass on desktop and mobile. Rotate the model, check the proportions, and confirm the product still reads correctly when the page gets smaller. Look for flattened areas, holes, strange highlights, or parts that drift away from the real object. If the model feels off, the usual fix is not more software. It is a better source photo set.
The comparison below shows why lighting matters so much. Harsh light and strong shadow lines make the reconstruction harder to trust, while soft light gives the model more even surface information.
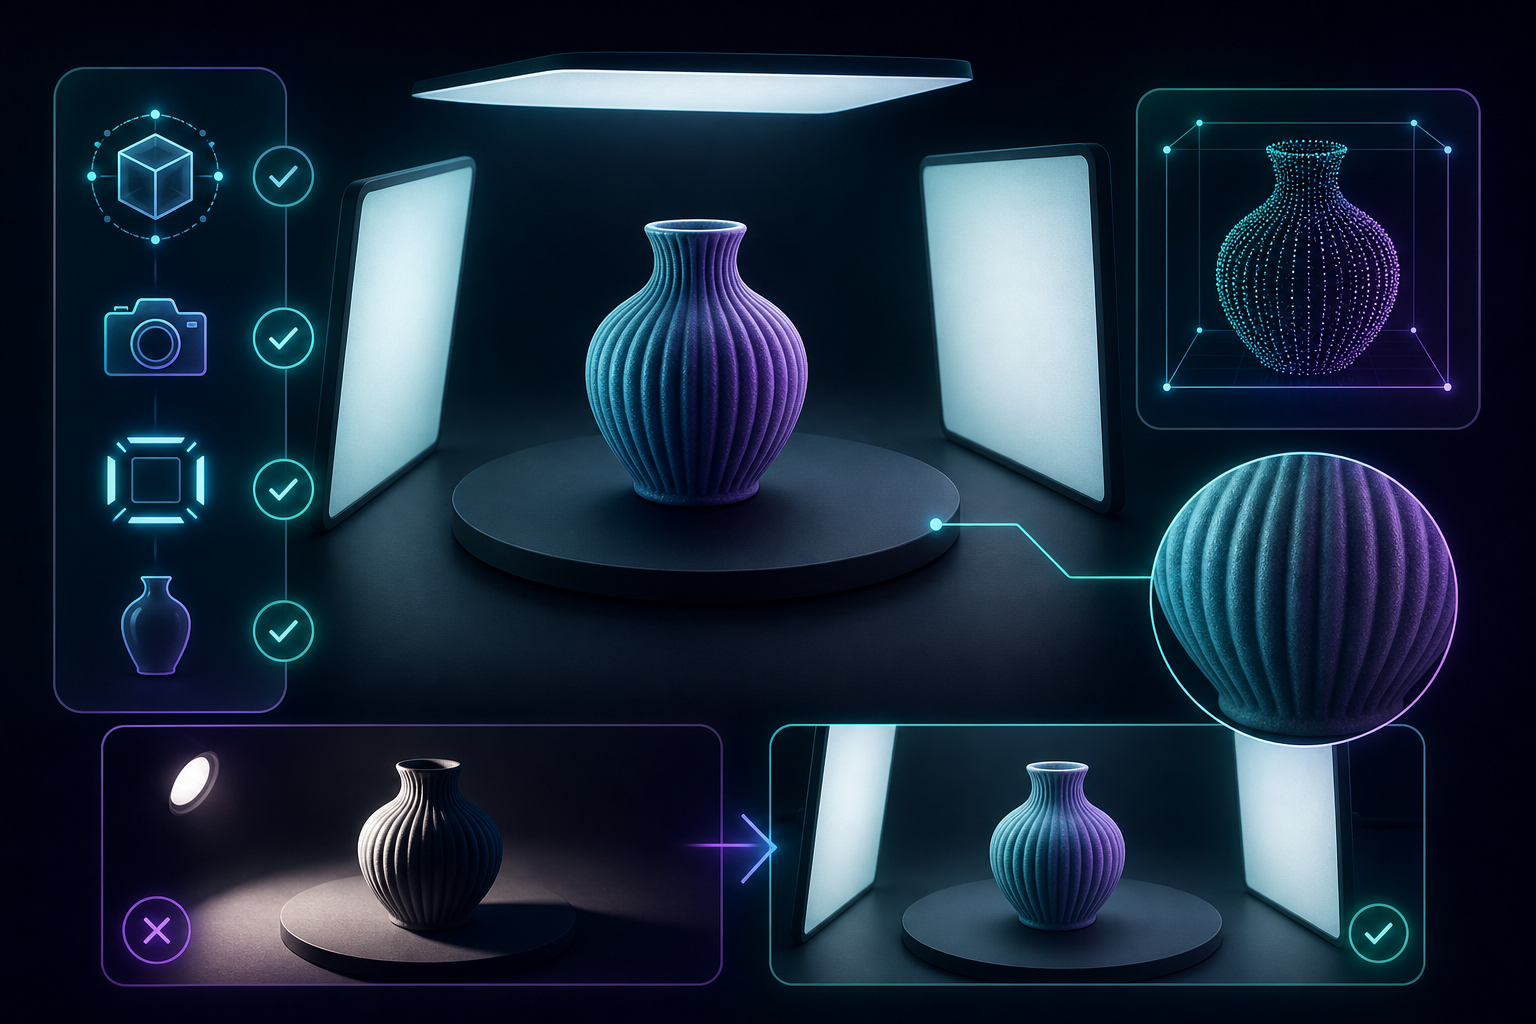
Expected result: the model looks stable enough that a shopper can understand the shape, not just admire the technology.
Common problems and quick fixes
- Blurry images: slow down, hold the phone steadier, and make sure exposure is stable.
- Reflections and glare: move the light source farther away and diffuse it more.
- Missing geometry: capture more angles, especially around the top, bottom, and back edges.
- Flat-looking output: choose a product with stronger shape cues or spend more time on even lighting.
- Overly busy backgrounds: remove anything near the product that could confuse the reconstruction.
These are normal capture problems, not signs that the workflow is broken. They usually come from the source set, not the Shopify publish step.
Why this workflow is worth keeping
A 3D model does not replace good photography. It complements it. Flat images are still useful for styling, color, and close detail, while interactive 3D helps with scale, depth, and confidence. That combination can make the page feel more complete and can reduce the expectation gap that leads to avoidable returns.
If you want the broader strategy behind the content side of that workflow, the same product-photo thinking carries over to How I Turn One Product Photo Into a Shopify Asset Pipeline and How I Build a Shopify Visual System From One Product Photo.
Next action
If you want to test the workflow quickly, start with one product, take the guided 10+ photo orbit, and publish the first GLB on a free plan. Supra 3D Capture’s Free tier includes 1 saved 3D model, 3 scans per month, Shopify-native publishing, and the theme app block. If the result is useful, you can move the same capture process across more SKUs without changing the basic workflow.
Try Supra 3D Capture or read the app listing on the Shopify App Store when you are ready to compare plans.