June 20, 2026
How to Choose the Right AI Edit for Each Shopify Product Photo
A practical guide to choosing enhancement, try-on, placement, and video edits for each Shopify product photo.
If you only have one decent product photo, the wrong move is to force every edit into the same workflow. Sometimes the photo just needs cleanup. Sometimes it needs a model. Sometimes it needs a scene. Sometimes it needs motion. Supra AI Photo Studio gives you those paths inside Shopify, so the goal is to choose the smallest edit that gets you the best conversion-ready asset.
If you want to see the app first, start with the Shopify App Store listing or the landing page. There is also a demo trailer if you want to see the flow before you test it.
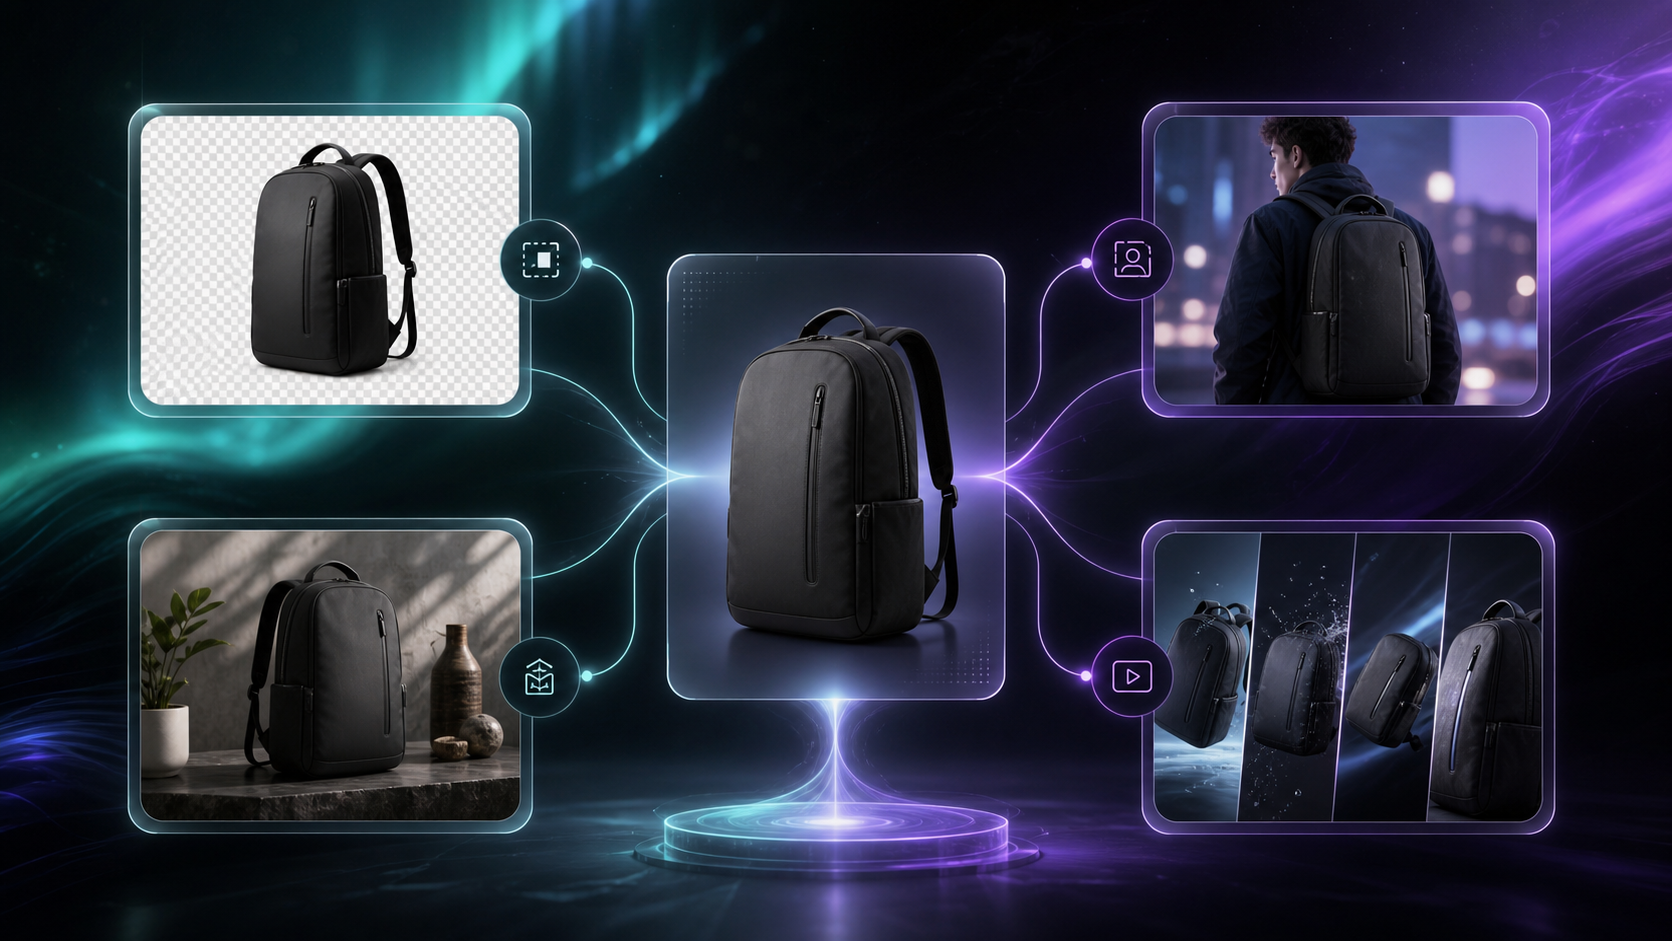
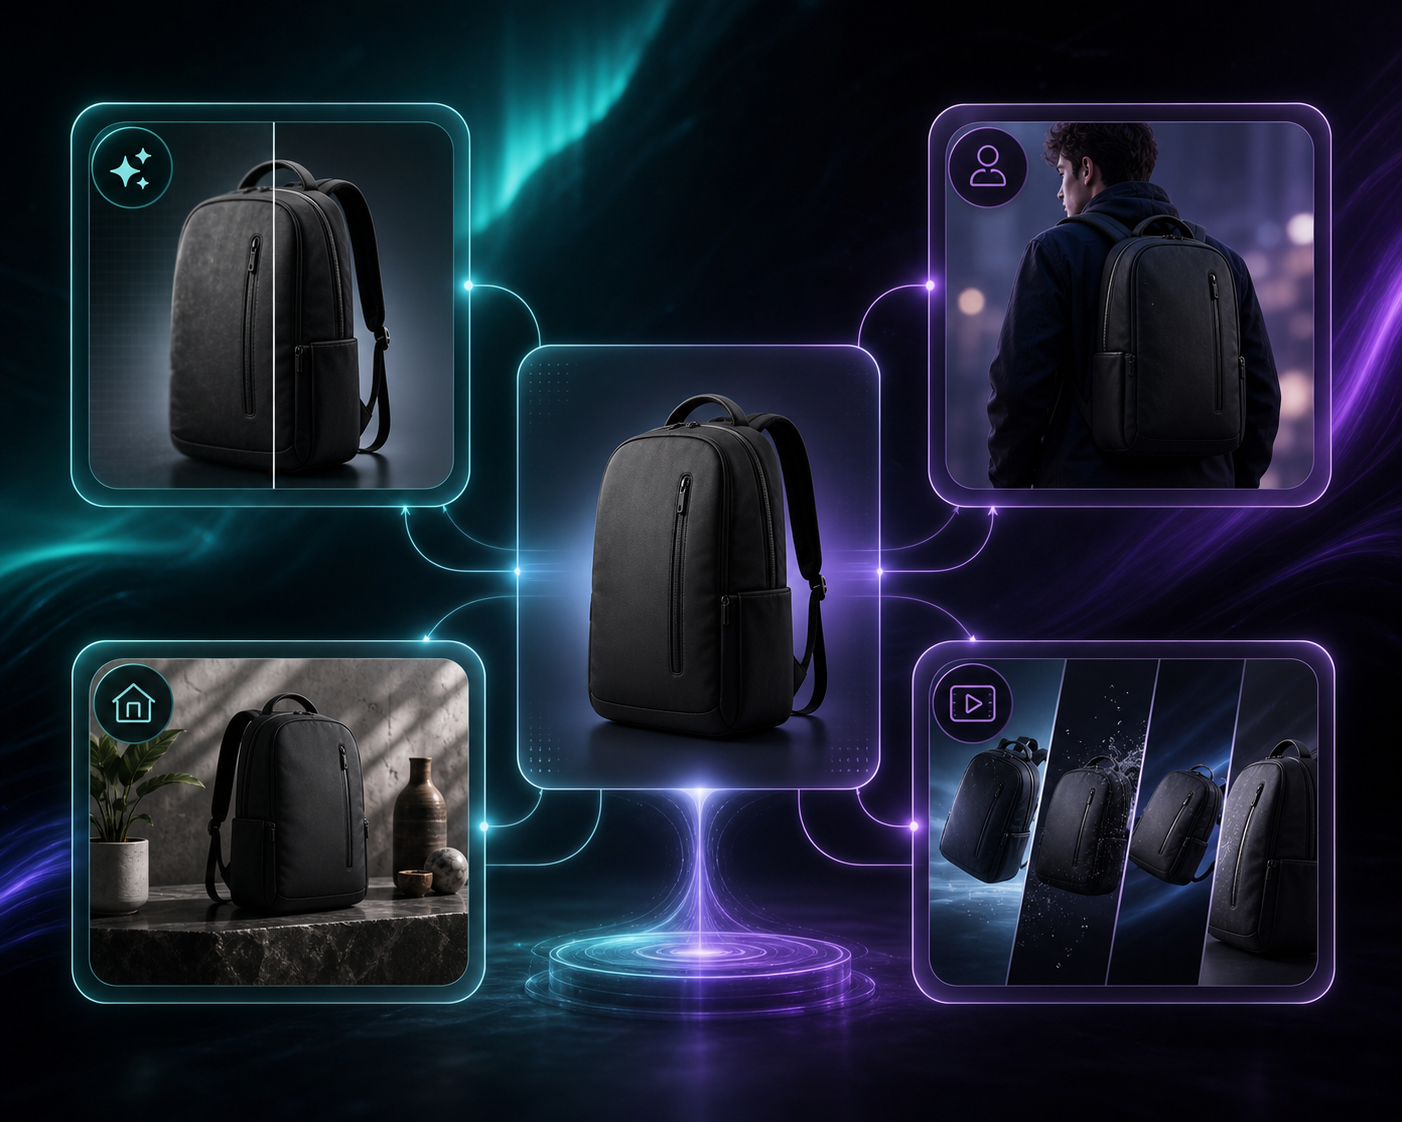
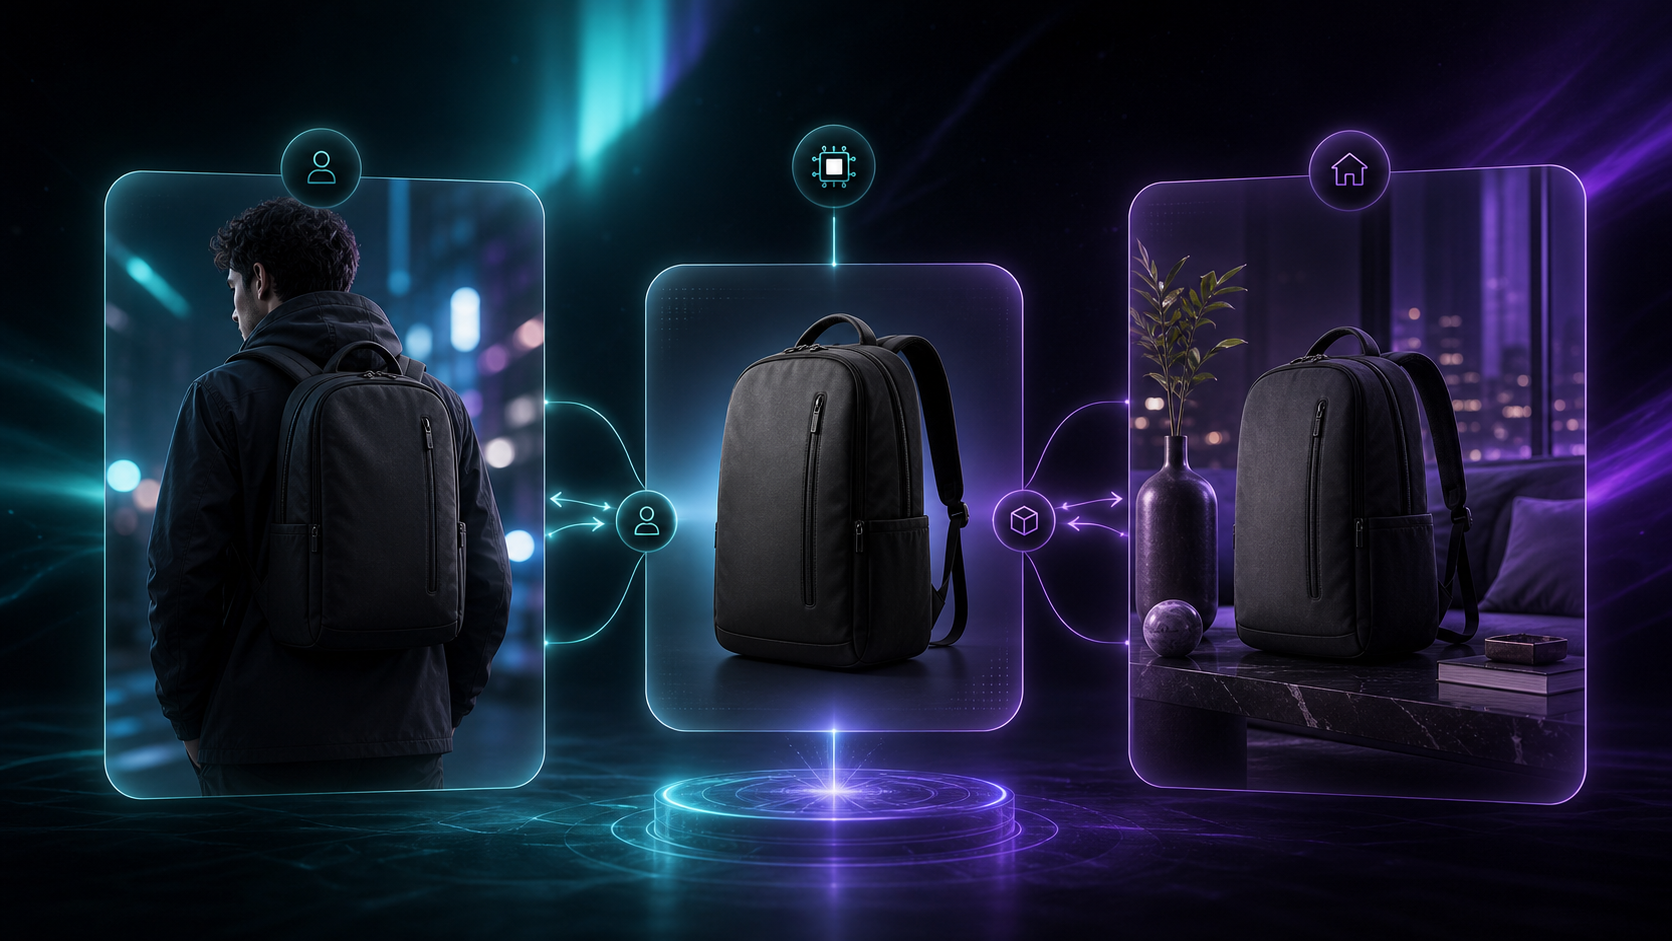
1. Start by classifying the source image
Before you click anything, ask what the photo is missing.
- If the product is already framed well but looks noisy or dull, use enhancement.
- If the product is apparel or jewelry that needs to be seen on a person, use try-on.
- If the product is hard to imagine without context, use object placement.
- If the asset is for ads or social and needs movement, use UGC or b-roll video.
The fastest way to avoid wasted generations is to match the output to the job. If the base photo is already strong, do not force it into a lifestyle scene just because the tool can. If you want the broader one-shot workflow, see How to Build a Repeatable Shopify Image Workflow From One Product Shot.
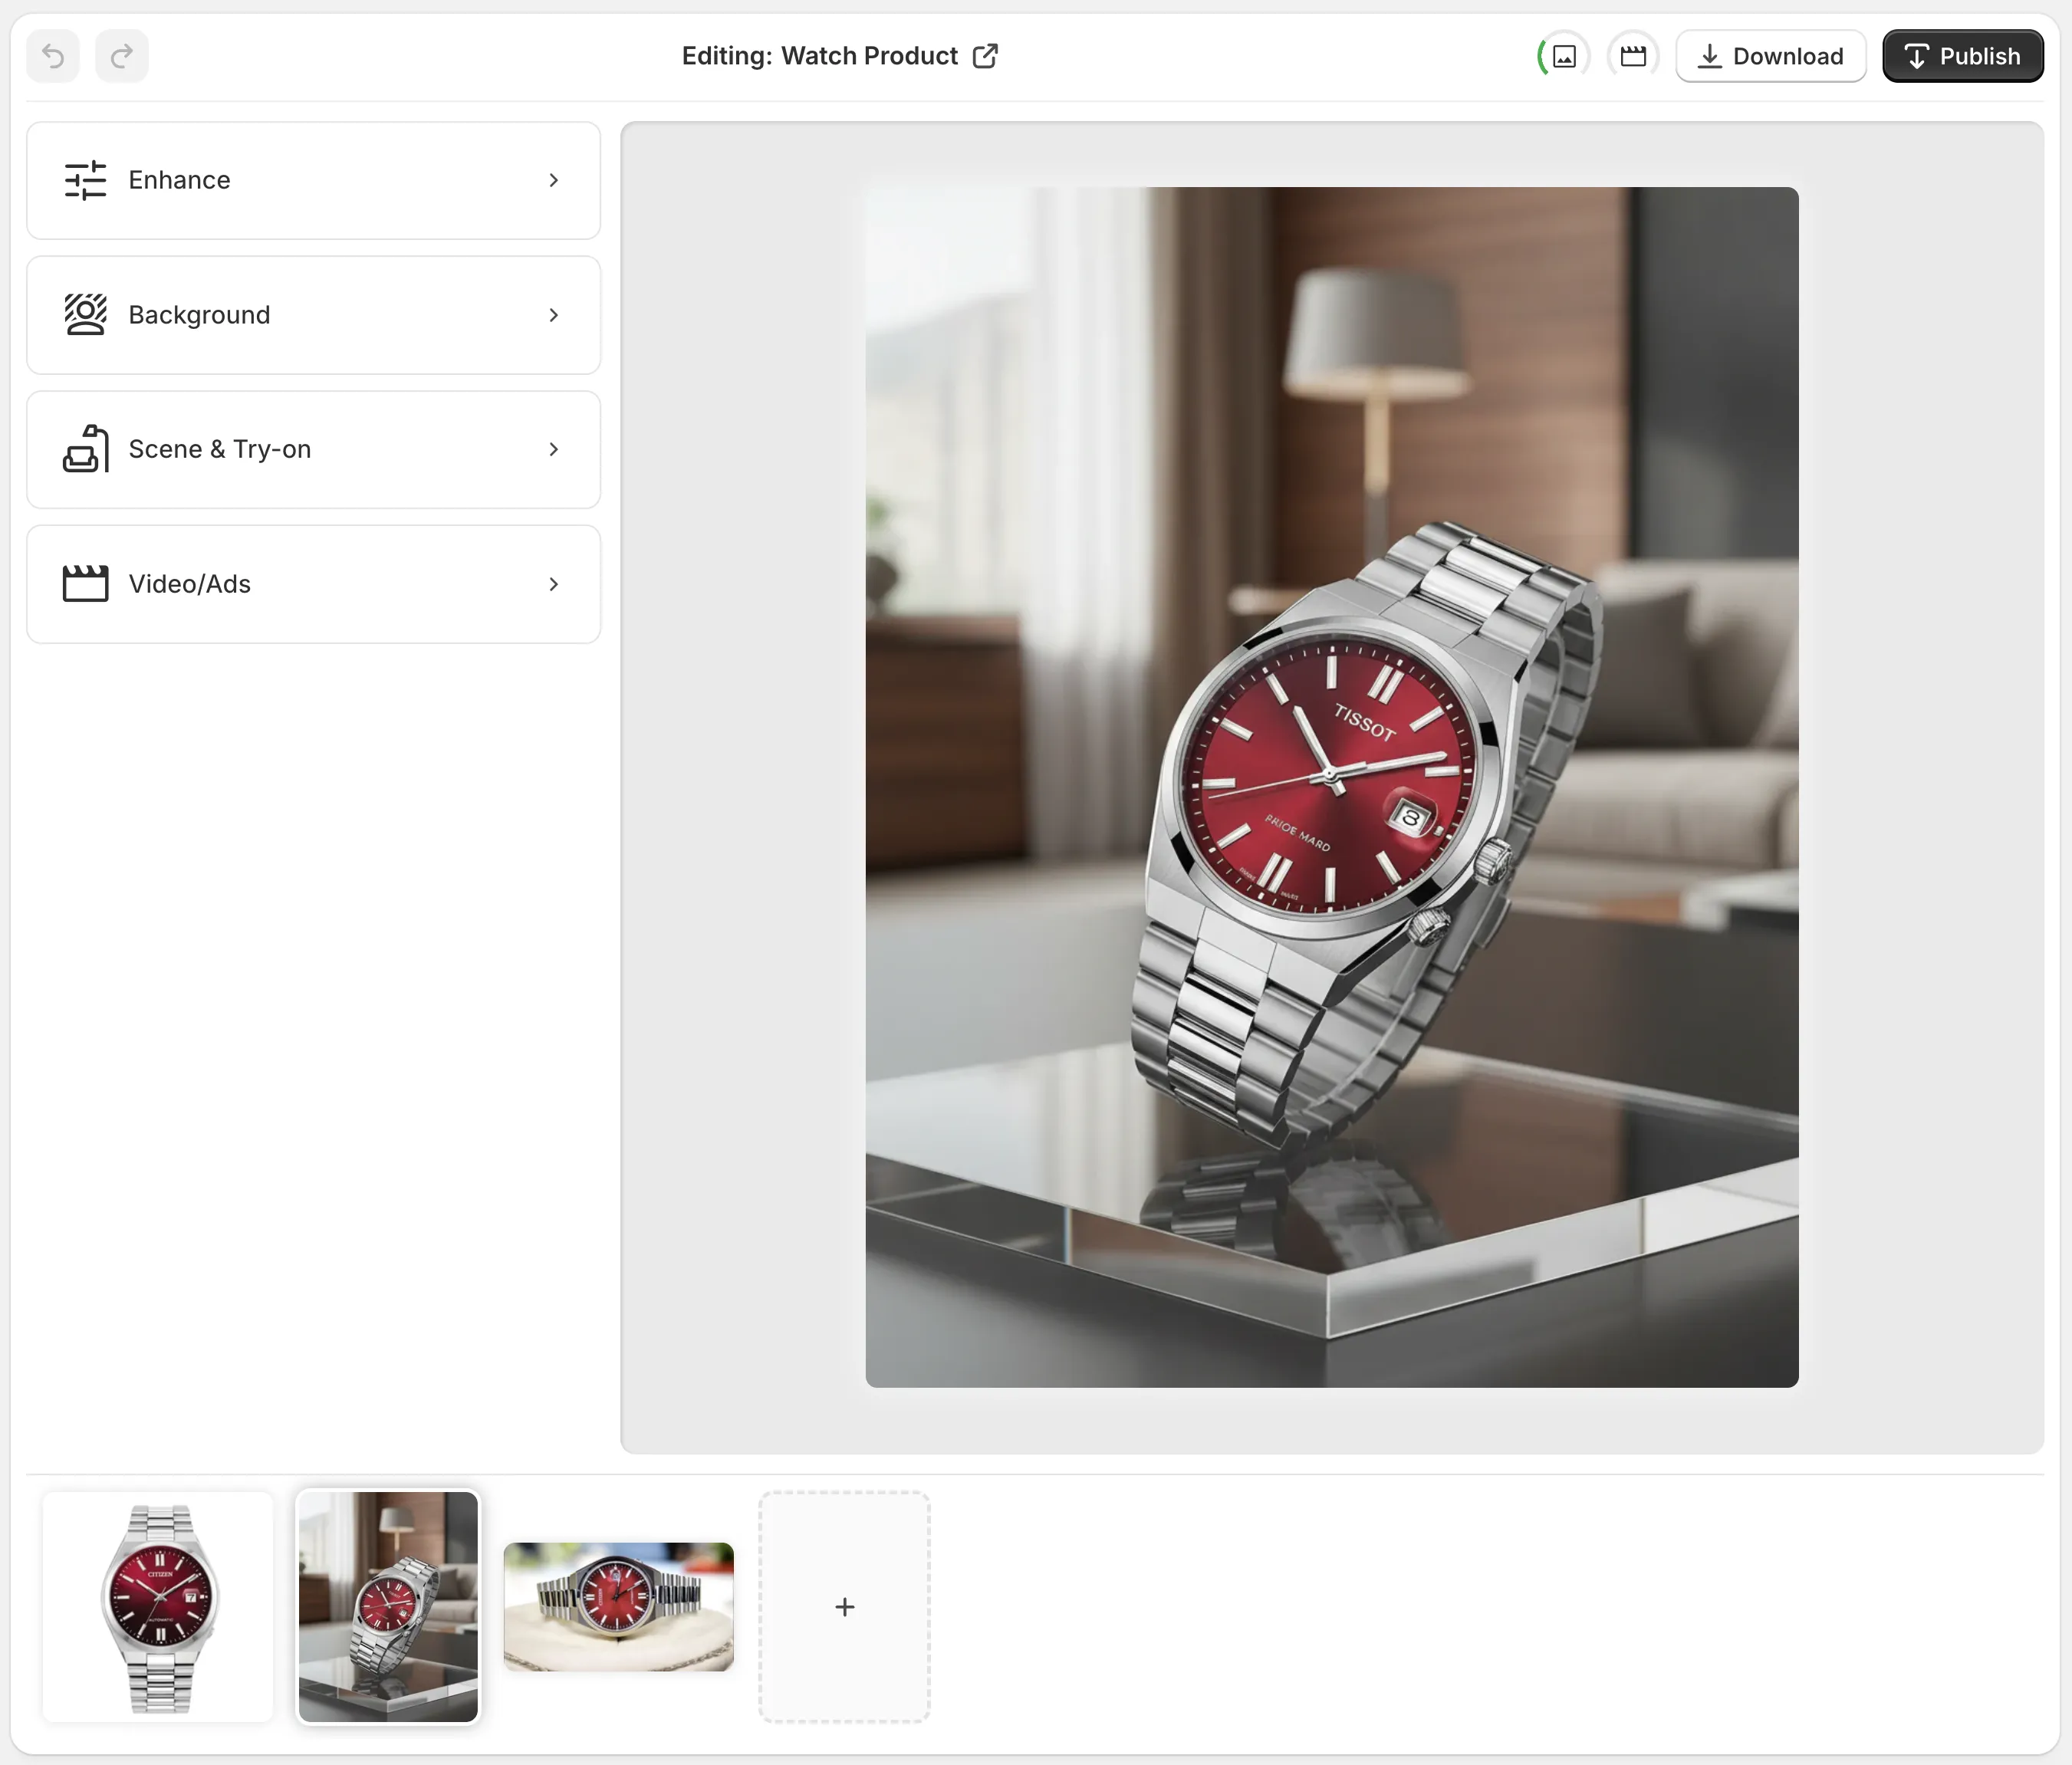
2. Use enhancement when the frame is right but the execution is weak
The help page shows the editor split into a top bar, left-side tools, a right-side canvas, and a bottom gallery. That matters because enhancement should be your first pass when the photo only needs cleanup.
- Remove or replace the background.
- Upscale the image.
- Fix lighting, color, and deblur issues.
- Isolate the product first if the image has distractions.
Expected result: a cleaner source asset that still looks like your original product, just more usable across PDPs and ads. If you want a broader comparison of photo paths, read How I Choose Between AI Enhancement, Try-Ons, and Lifestyle Scenes for Shopify Photos and How to Build a Premium Shopify Image Workflow Without a Designer.
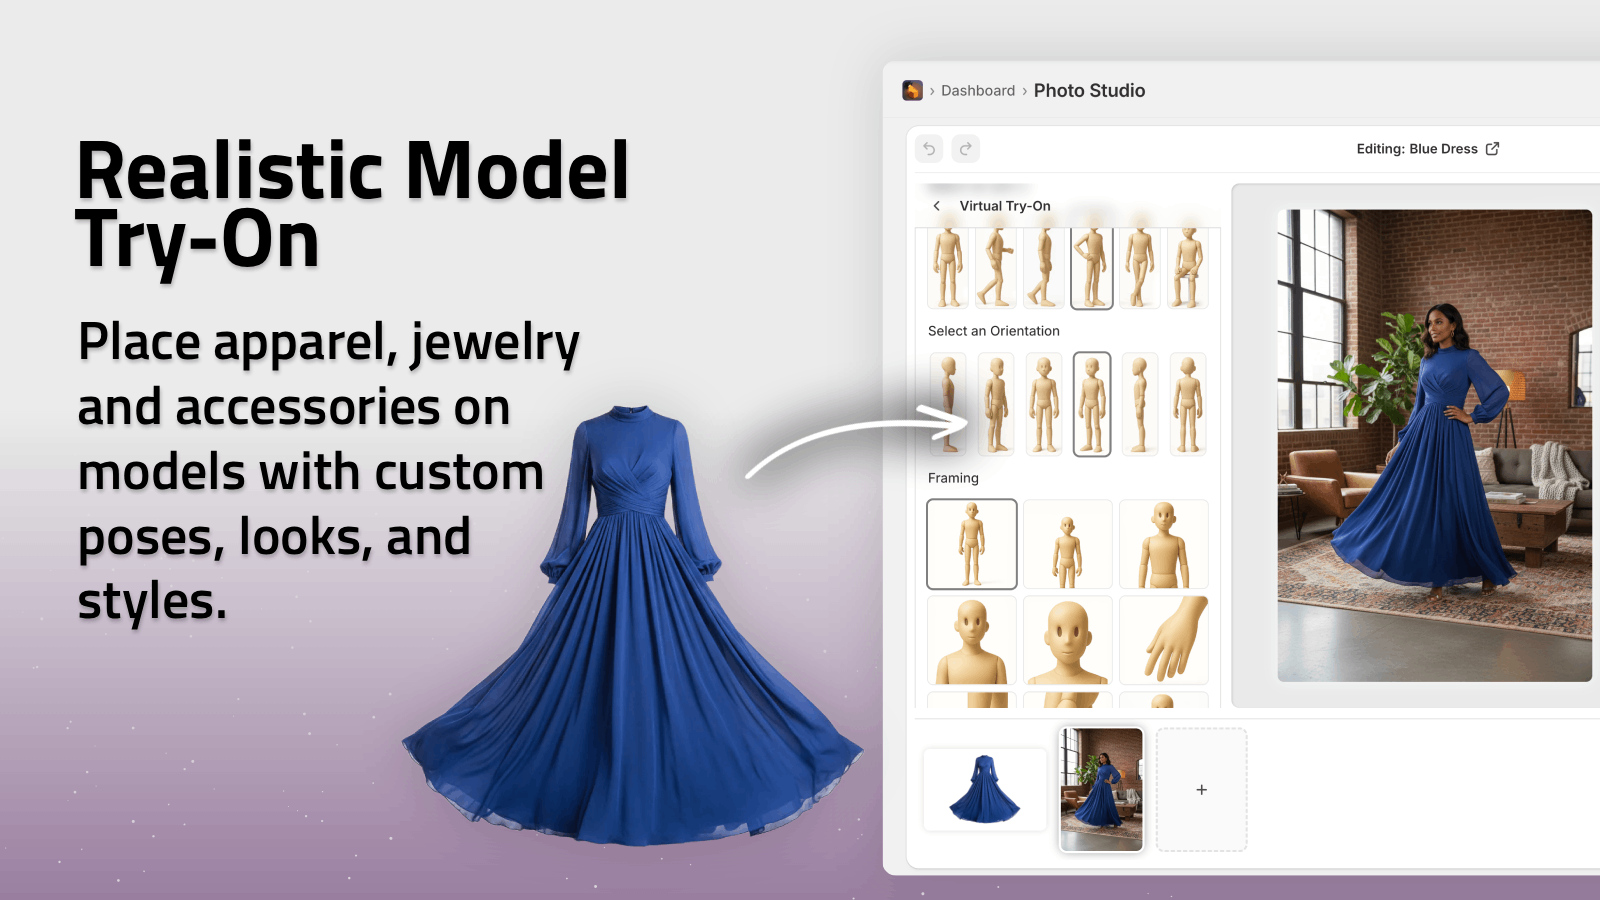
3. Use try-on when the product needs a body, fit, or scale cue
Try-on is the right move for apparel, accessories, and jewelry when the product itself is the selling point but the customer needs more context.
- Choose or create a model that matches the target customer.
- Put the product on the model.
- Check that the result still preserves the product details.
- Compare a few variations before publishing.
Expected result: a product photo that reads like a real catalog image rather than a generic AI mockup. The app listing specifically calls out realistic model try-ons and the ability to create your own models, which makes it useful when brand fit matters more than novelty. For a related end-to-end example, see How to Turn One Product Photo Into a Full Shopify Image Set.
4. Use object placement when the product needs a setting
If the product is not wearable, object placement usually beats try-on. A mug, candle, bottle, gadget, or home item often converts better when it appears in a believable room, studio, boutique, or outdoor context.
- Pick the environment first.
- Choose the camera angle and lighting style.
- Place the product on the surface that supports the story.
- Keep the scene simple enough that the product stays the hero.
Expected result: a lifestyle shot that feels designed, not pasted together. This is the path to use when you need one image for the PDP and another for social, but you want both to stay visually aligned.
5. Use UGC or b-roll when the asset is for ads
The app also generates short product videos, which is useful when a static image will not do the job.
- Use UGC-style video when you want a social-ad feel.
- Use b-roll when you need motion, impact, dust, liquid, or reveal effects.
- Keep the motion focused on the product rather than the effect.
Expected result: a short clip that feels like ad creative instead of an afterthought. If you want to see the editor flow around those tools, the help page screenshot and the demo trailer are enough to understand the sequence before you generate anything live.

6. Keep the workflow repeatable
The point of using Supra AI Photo Studio is not to create one perfect image. It is to turn one source photo into a repeatable production pattern.
- Keep the same product as your base asset.
- Reuse the same edit decision for similar SKUs.
- Save the better variants for product pages, ads, and social.
- Let the free plan or the pricing tier you choose match your monthly image and video volume.
Expected result: fewer manual edits, fewer inconsistent visuals, and a catalog that looks like one brand instead of a pile of one-off outputs.
Related reading:
- How to Build a Repeatable Shopify Image Workflow From One Product Shot
- How to Turn One Product Photo Into a Full Shopify Image Set
- How I Choose Between AI Enhancement, Try-Ons, and Lifestyle Scenes for Shopify Photos
- How to Build a Premium Shopify Image Workflow Without a Designer
Conclusion
If the product photo is close, enhance it. If it needs a person, use try-on. If it needs a place, use object placement. If it needs movement, use video. That is the simplest way to keep your Shopify visuals consistent without turning every asset into a special case.
Start with the Supra AI Photo Studio app listing, test the free plan, and run one product through all four paths before you decide which one belongs in your catalog.