June 22, 2026
How to Decide Which Shopify Products Need Try-On, Placement, or Video
A practical workflow for choosing enhancement, try-on, placement, and video based on product type.
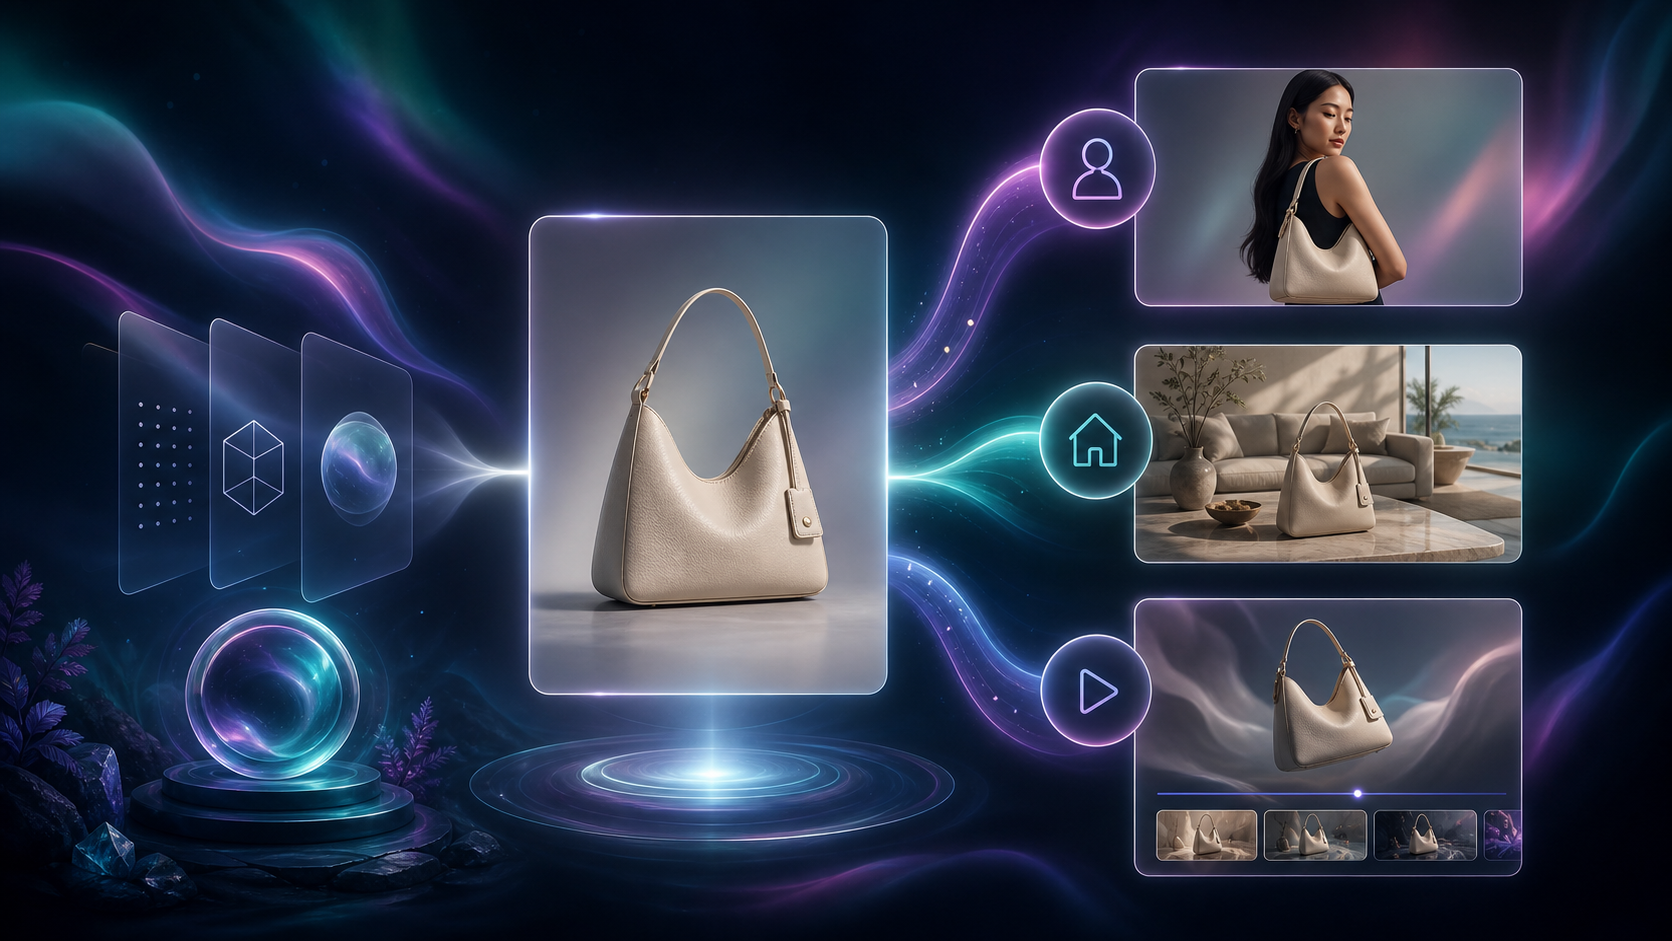
If you have apparel, decor, and ad creative in the same catalog, one AI edit path will not fit every SKU. Supra AI Photo Studio gives you four useful lanes inside Shopify: clean the source, try it on a model, place it in a scene, or turn it into motion. The goal is to pick the smallest edit that solves the product’s actual problem.
If you want to see the app first, start with the Shopify App Store listing or the landing page. The demo trailer is a quick preview if you want to watch the workflow before you test a SKU.
1. Classify the product before you open the editor
Ask one question: what does the customer need to understand that the current photo does not show?
- If the frame is noisy, dull, or low resolution, start with enhancement.
- If the product is worn by a person, use try-on.
- If the product needs context on a table, shelf, or room, use object placement.
- If the asset is for social or ads and needs motion, use UGC or b-roll video.
Expected result: you know which lane to use before you spend time generating versions you will not ship.

That decision tree is the part most merchants skip. It is tempting to jump straight into the fanciest output, but the better move is to match the edit to the missing context. If you want the narrower version of this process, see How to Choose the Right AI Edit for Each Shopify Product Photo.
2. Clean the source first when the product is already right
Sometimes the right answer is not a new scene. It is a better version of the same image.
The help page shows the editor split into a top bar, left-side tools, a canvas on the right, and an image gallery at the bottom. That layout matters because the cleanest workflow is usually the simplest one: isolate the product, make the base image usable, and only then decide whether you need a new setting.
- Use the Isolate Product tool when the background is distracting.
- Remove or replace the background when the frame is otherwise solid.
- Upscale or denoise when the image is soft or compressed.
- Correct lighting and color before you spend credits on a more ambitious edit.
Expected result: a cleaner source asset that still looks like the original product, only more usable across product pages, ads, and social.
If you want a more reusable base-asset approach, read How to Build a Repeatable Shopify Image Workflow From One Product Shot.
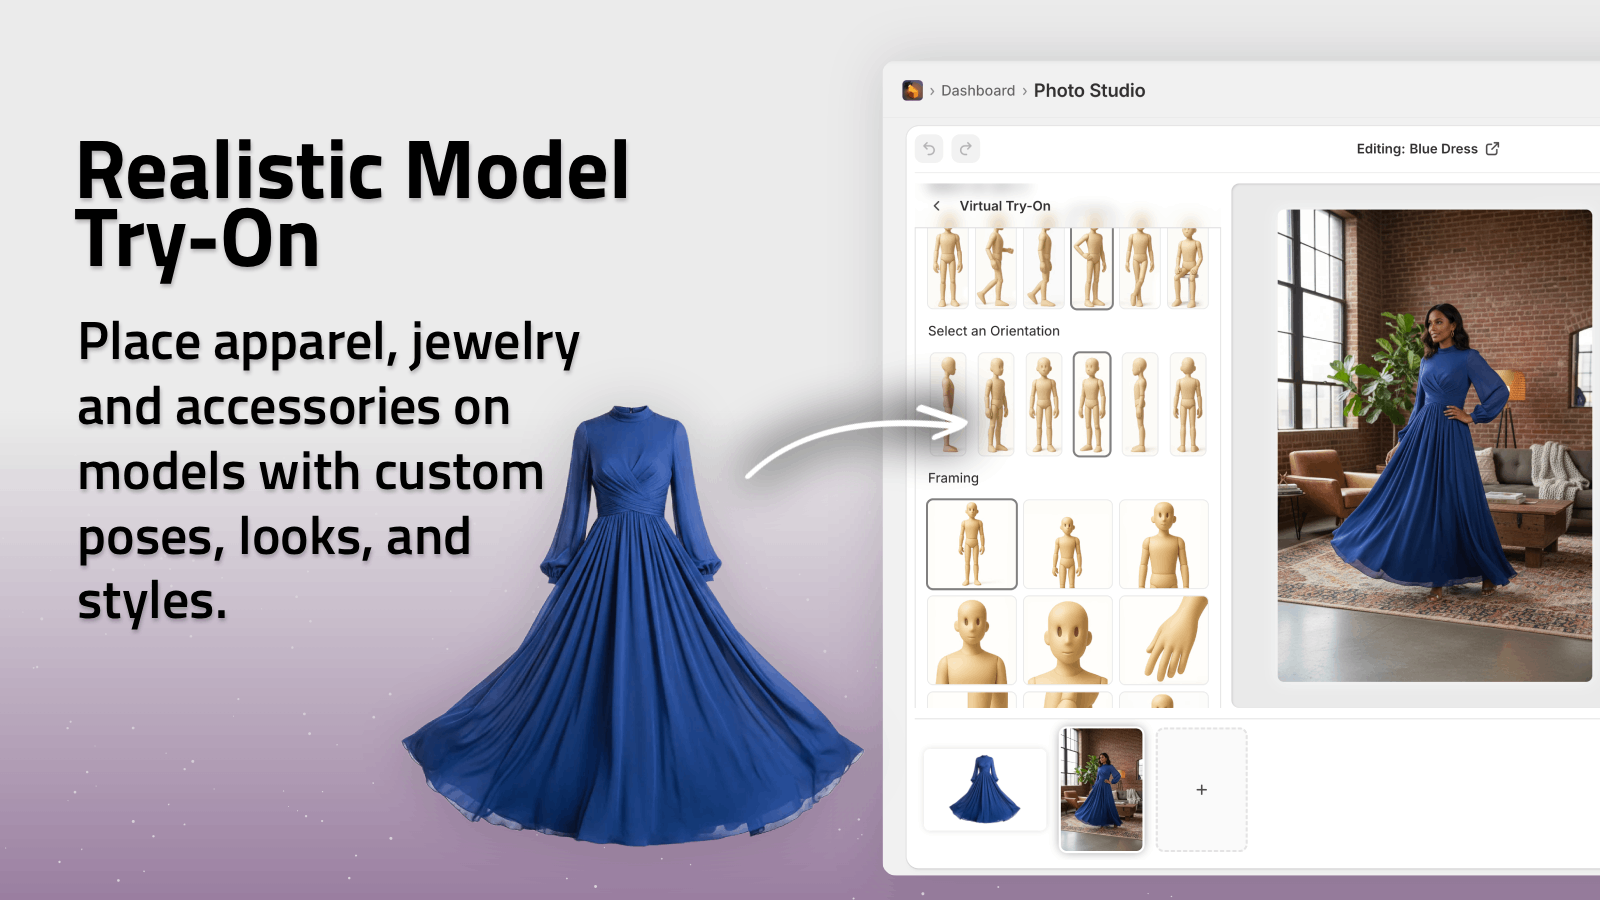
3. Use try-on when fit, scale, or wearability matters
Try-on is the right move for apparel, accessories, and jewelry when the product is the story but the shopper needs a body for context.
- Choose or create a model that matches the shopper you want to reach.
- Put the product on the model.
- Check that the details still read clearly.
- Compare a few variations before you publish the final asset.
Expected result: the product reads like a real catalog image instead of a generic AI mockup.
This is the lane I would use for bags, shirts, rings, sunglasses, and other products where the person and the item need to feel believable together. If you want a broader visual comparison, see How I Choose Between AI Enhancement, Try-Ons, and Lifestyle Scenes for Shopify Photos.
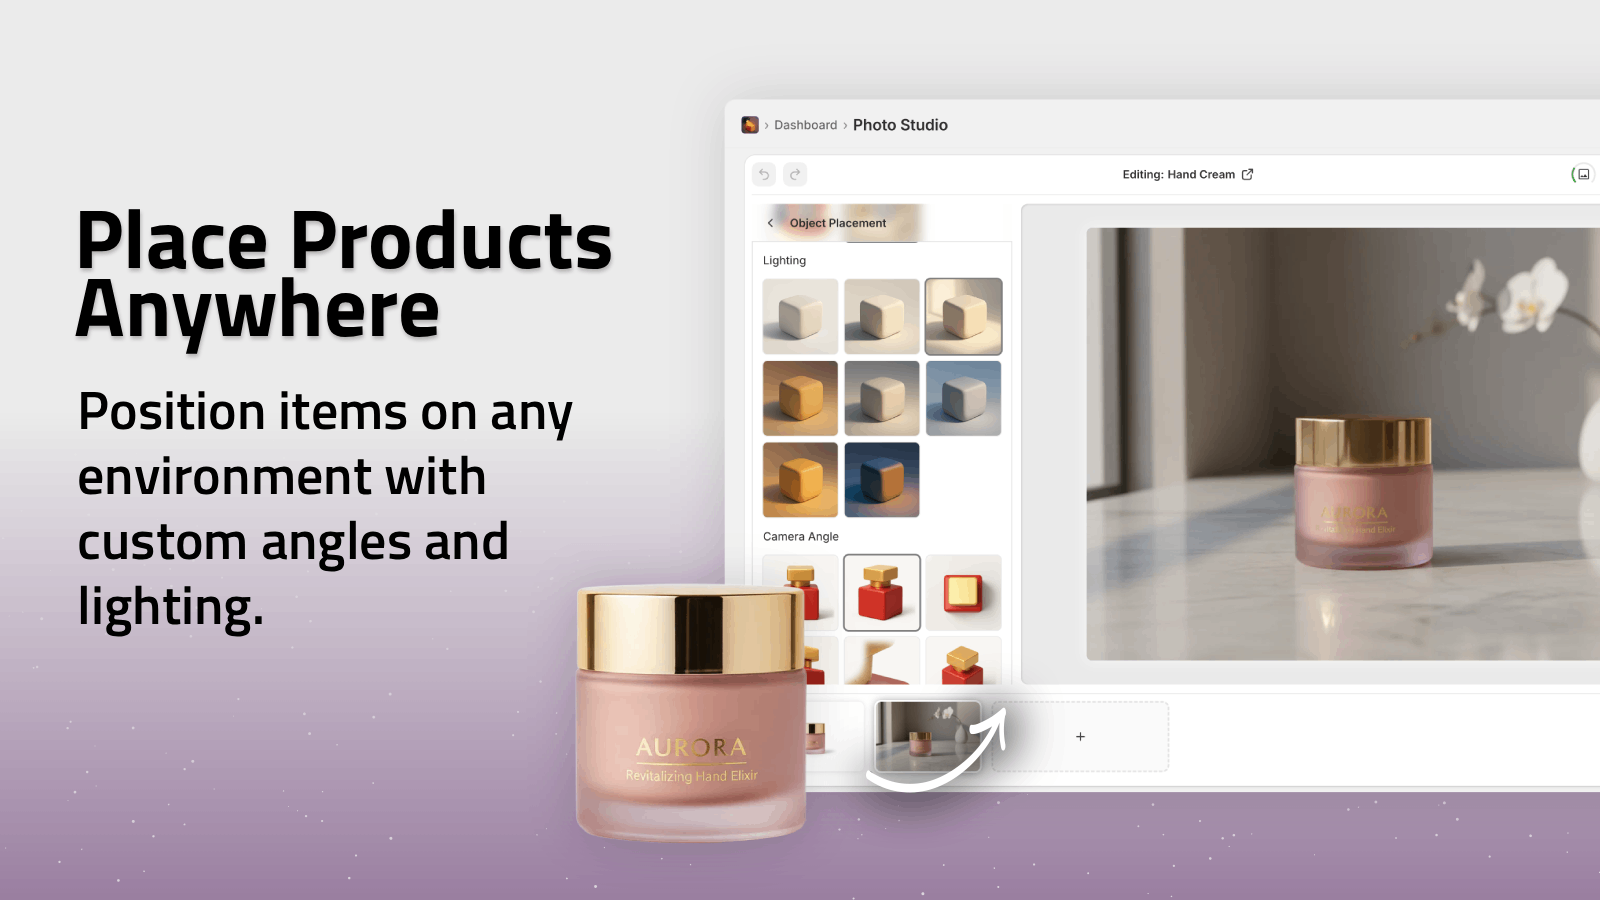
4. Use object placement when the product needs a believable setting
If the product is not wearable, object placement usually wins. A mug, candle, bottle, lamp, gadget, or decor item often converts better when it appears in a realistic room, studio, boutique, or outdoor context.
- Pick the environment first.
- Choose the camera angle and lighting style.
- Place the product on the surface that supports the story.
- Keep the scene simple enough that the product stays the hero.
Expected result: a lifestyle shot that feels designed, not pasted together.
If you want a more polished version of this same idea, read How to Build a Premium Shopify Image Workflow Without a Designer. If you want the output to expand into a complete set, read How to Turn One Product Photo Into a Full Shopify Image Set.
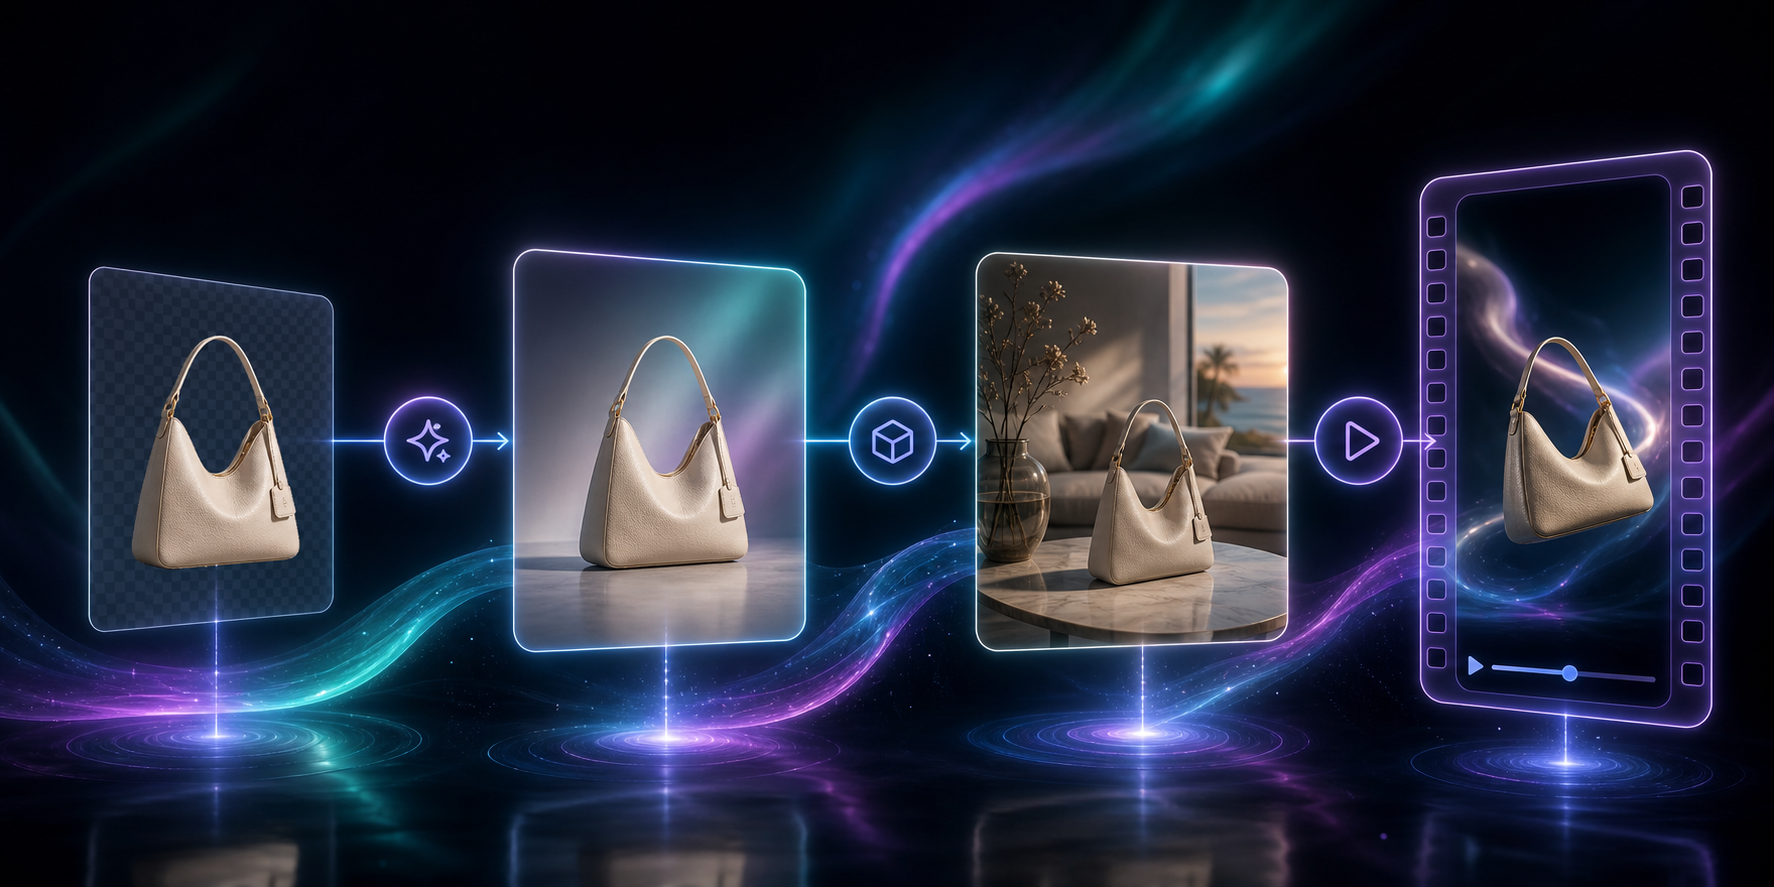
5. Use video when motion is the conversion lever
If the asset is for ads or social, still images may not be enough. Supra AI Photo Studio also supports UGC videos and b-roll videos, which makes it useful when you want motion without a separate production pipeline.
- Use UGC-style video when you want social-ad energy.
- Use b-roll when you want impact, reveal, dust, liquid, or other motion cues.
- Keep the motion focused on the product instead of the effect.
Expected result: you have a motion asset for ads or social, not just another still.
The demo trailer is worth watching here because it gives you a quick feel for how the tool moves from static inputs to moving outputs. For a different take on building a repeatable asset pipeline, see How to Build a Repeatable Shopify Image Workflow From One Product Shot and How to Turn One Product Photo Into a Full Shopify Image Set.
6. Reuse the decision rule across the catalog
The real win is consistency. Once you know which products belong in which lane, you can repeat the same choice across similar SKUs and collections instead of starting over every time.
That is also why the best workflow is not “generate everything.” It is “generate the right thing for this product type, then reuse that rule the next time the same problem shows up.”
If you want the shorter version of this article, keep this rule in mind:
- If the product is already close, enhance it.
- If it needs a person, try it on.
- If it needs a place, place it.
- If it needs movement, turn it into video.
Conclusion
Supra AI Photo Studio works best when you treat it as a decision system, not just an image generator. Start with the product type, pick the smallest edit that solves the problem, and only then scale the workflow across the rest of the catalog.
Start with the Supra AI Photo Studio app listing, test the free plan on one SKU, and build the rule set before you roll it out to the entire store.