
August 3, 2026
How to Move a Framer Site to GitHub Pages With ExFlow
Export a Framer site to static files, keep the assets intact, and publish it on GitHub Pages.

If you want to keep a Framer design and publish it on GitHub Pages, the main problem is not the design itself. It is the handoff from an animated Framer site to a clean static file tree that GitHub Pages can serve without extra rebuilding.
ExFlow is built for that handoff. You give it a Framer URL, choose the export settings you need, and get static HTML, CSS, JavaScript, and media files that can be pushed through Git. If you want the broader export context first, this guide pairs well with How to Export a Framer Site to Static HTML Without Rebuilding It, How to Export a Framer Site Without Breaking Links or Assets, How to Export a Framer Site to HTML, Git, or S3, and How to Download a Framer Site as Static HTML and Self-Host It.

1. Decide what the export needs to preserve
Start by listing the parts of the Framer site that must survive the move. For most sites, that means every page, the CSS that drives layout, the JavaScript that powers interactions, and the image or media files that live behind the scenes.
If the site is simple, you may only need the default export. If it relies on page-specific assets, dynamic sections, or custom styling, plan to keep those pieces turned on from the start. That is the easiest way to avoid a second export later.
Expected result: you know whether this is a simple static publish or a more complete migration before you touch the repo.
2. Export the Framer site from ExFlow
Open ExFlow.site, paste the Framer site URL, and turn on the settings that match your migration goal. The important options from the product brief are:
URLExport CSS FilesExport JS FilesExport Images / Media FilesExport All PagesRemove "Made with Framer" BadgePages should be exported with .html extension
If you plan to let ExFlow push directly to your repo, also enable Sync Git. If you prefer a local review first, download the export and inspect it before you commit anything.
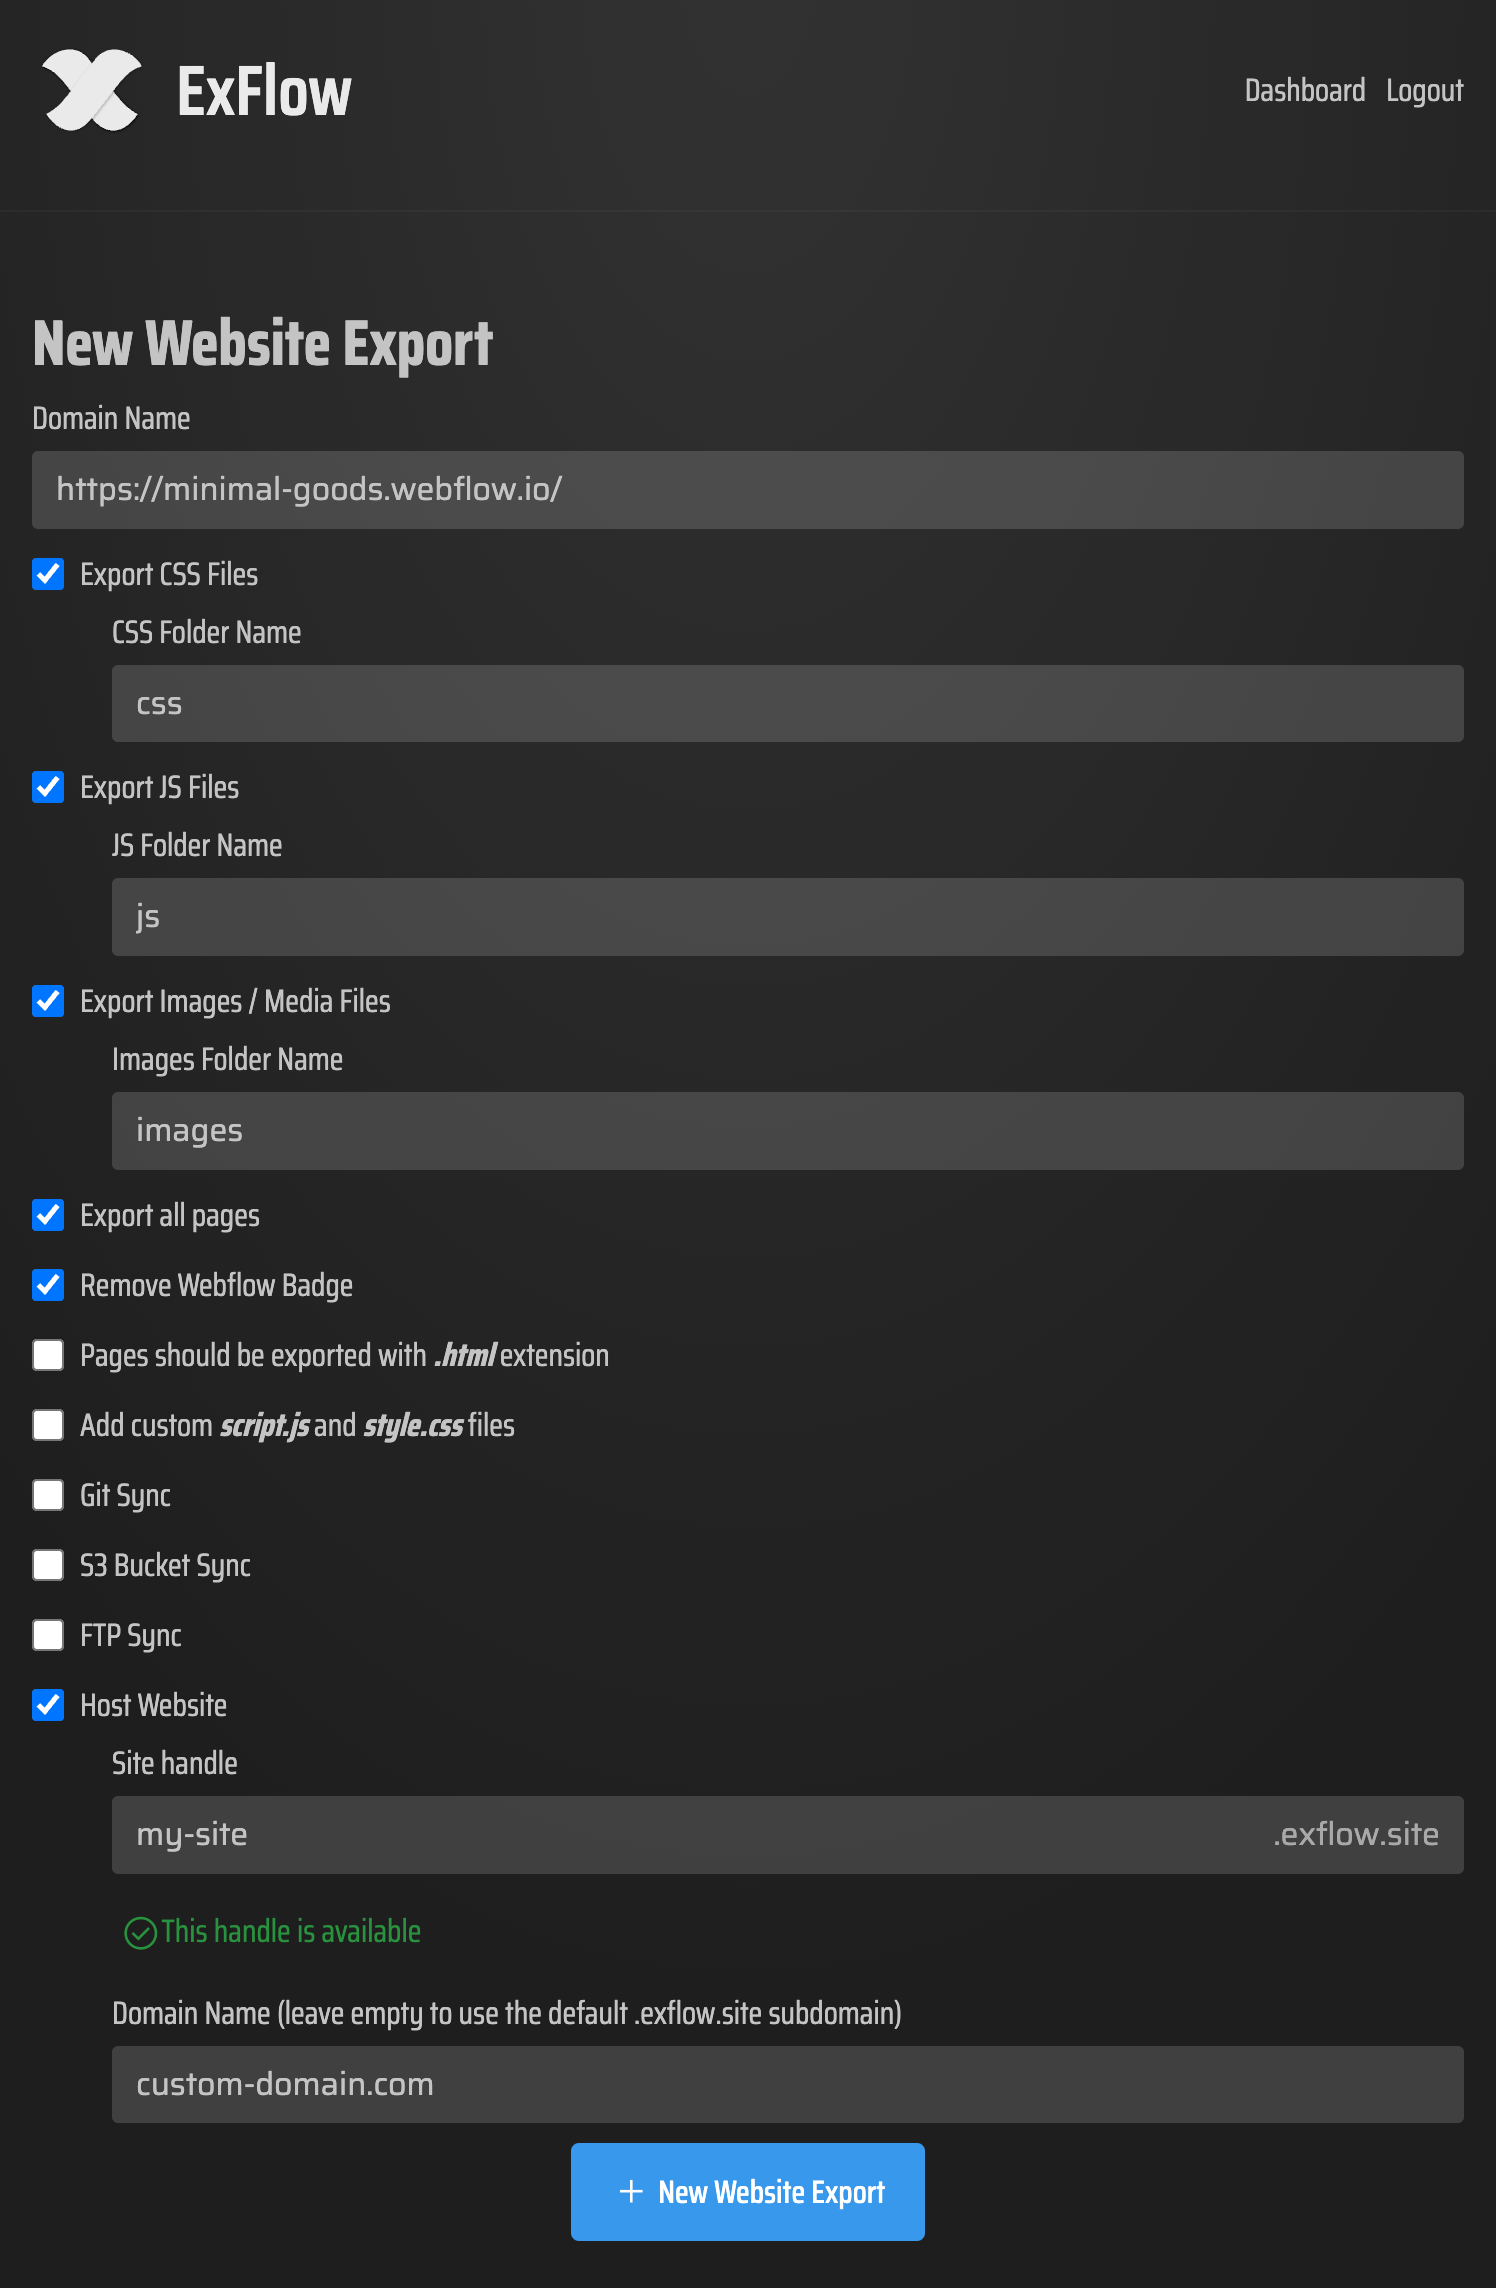
Expected result: ExFlow produces a static export that already matches the way GitHub Pages wants to consume files.
3. Inspect the exported files before you publish
Do not push the first archive blindly. Open the exported site structure and check that each page really exists as an .html file, the asset references are relative, and the images load from the exported bundle instead of Framer URLs.
This is the same checkpoint I would use in the related guides on breaking-link prevention and static HTML exports. If the site looks right here, it usually looks right after deployment too.
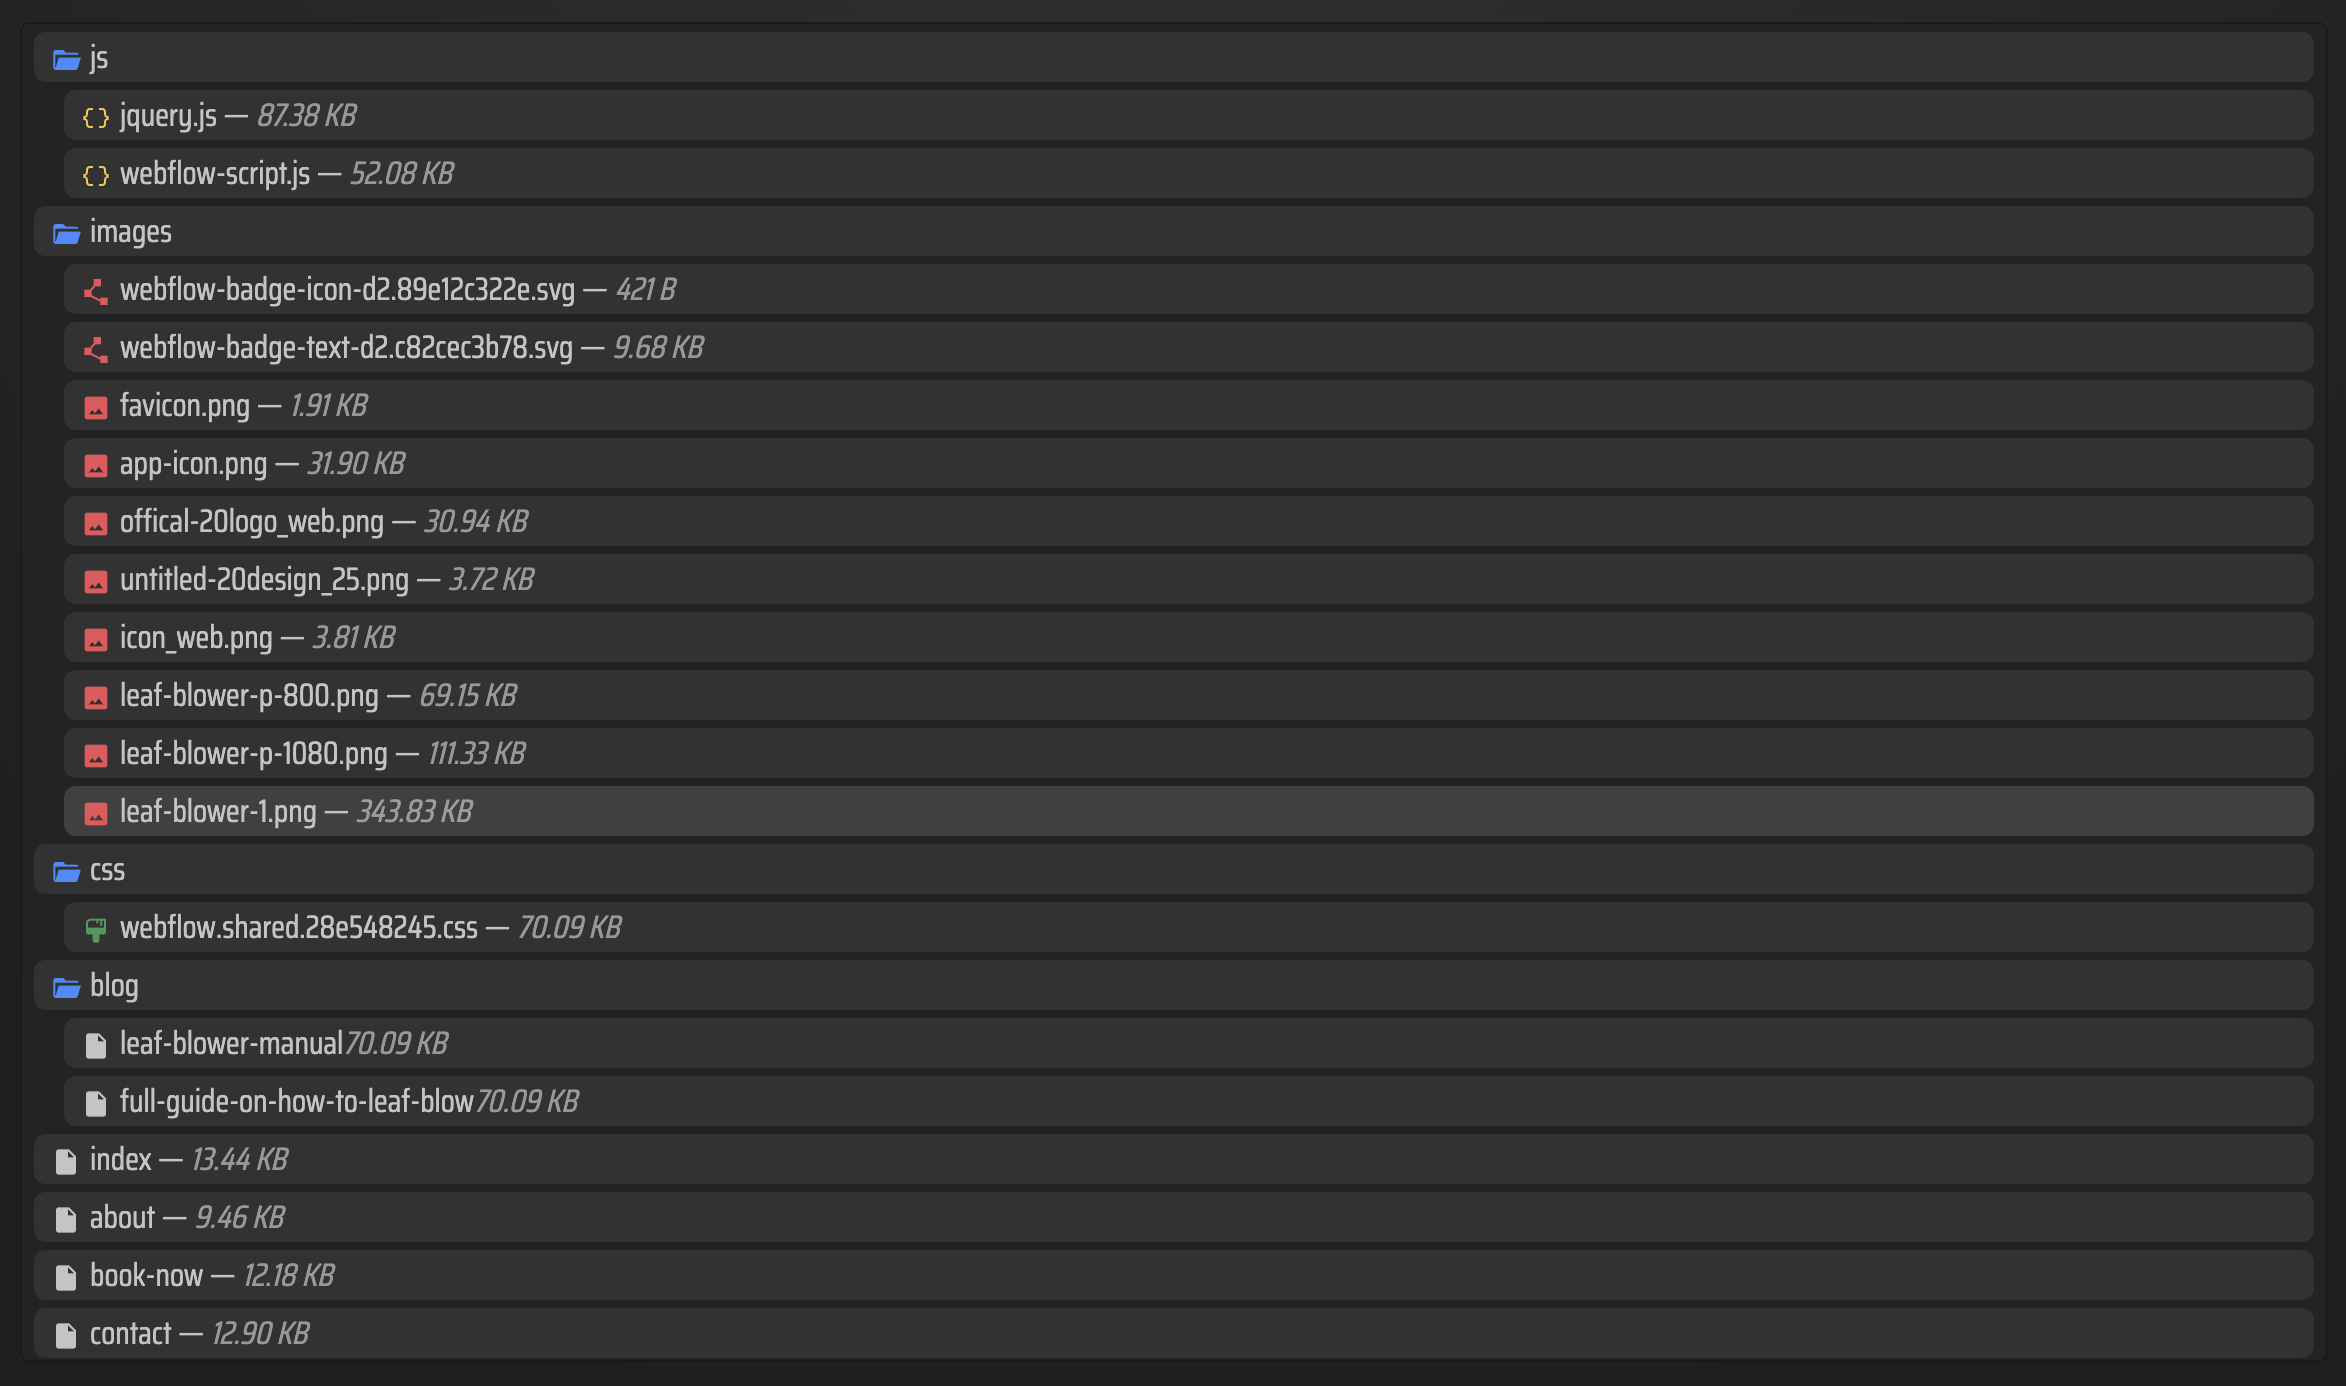
Expected result: you can open a few exported pages locally and they behave like static pages, not like a broken half-export.
4. Push the export into Git
If you want ExFlow to manage the push for you, use Sync Git and connect the repository that will back the GitHub Pages site. If you prefer a manual pass, copy the exported files into the repository yourself and commit them from the branch or folder that Pages reads.
The key is to keep the exported site at the publish root, not buried inside an extra zip folder or nested directory. GitHub Pages should see the same file tree that ExFlow exported.

Expected result: the repo contains the exported site in a form GitHub Pages can serve directly.
5. Turn on GitHub Pages and verify the public URL
In the repository settings, point GitHub Pages at the branch or folder that contains the exported Framer files. Once the build completes, check the live URL and click through a few pages, images, and navigation links.
If anything looks off, the usual causes are a missed asset export, a path that still points at the old Framer structure, or a page that was not included in the export. That is where a focused re-export is faster than manual repairs.
Expected result: the site loads at a public GitHub Pages URL and the core navigation works end to end.
6. Keep the workflow easy to repeat
Once the first export is stable, keep the repo ready for the next Framer change. Re-run ExFlow when the design changes, keep the Git sync target consistent, and use the same export settings for future updates so you do not drift into one-off fixes.
If you need a broader hosting path later, ExFlow also supports hosting and hosting status, but the GitHub Pages route is a good default when you want static delivery and version control together.
Expected result: the next Framer update is an export-and-push job instead of a full migration project.
The practical rule is simple: export the Framer site once, verify the static output, then let GitHub Pages do the part it is good at. If you want to try the workflow on one page first, start at ExFlow.site and export the smallest representative page before moving the full site.