
July 24, 2026
How to Export a Framer Site to Static HTML Without Rebuilding It
A practical Framer export workflow for turning a live site into static HTML, CSS, JS, and hosted files without rebuilding the design.

If you need to move a Framer site to a static host, ExFlow.site gives you a direct path: export the Framer URL, choose the files and pages you want, and then host the result somewhere you control. The point is not to redesign the site. It is to keep the layout, assets, and navigation intact while turning the project into downloadable static files.
I would use this workflow when I wanted to keep a Framer build portable, reduce hosting lock-in, or hand the site off to Git, S3, FTP, or ExFlow hosting without starting over.
1. Start with the export goal
Before you export anything, decide what the static version must preserve. For most Framer sites, that means the full page set, CSS, JavaScript, images, and media files. If the site depends on custom scripts or a custom stylesheet, plan for those too.
Expected result: you know whether you are preserving the whole site or just a subset of pages.
2. Enter the Framer URL in ExFlow
Open ExFlow.site and paste the published Framer URL into the export field. That is the handoff point: ExFlow reads the site and prepares it for a static export instead of a live Framer runtime.
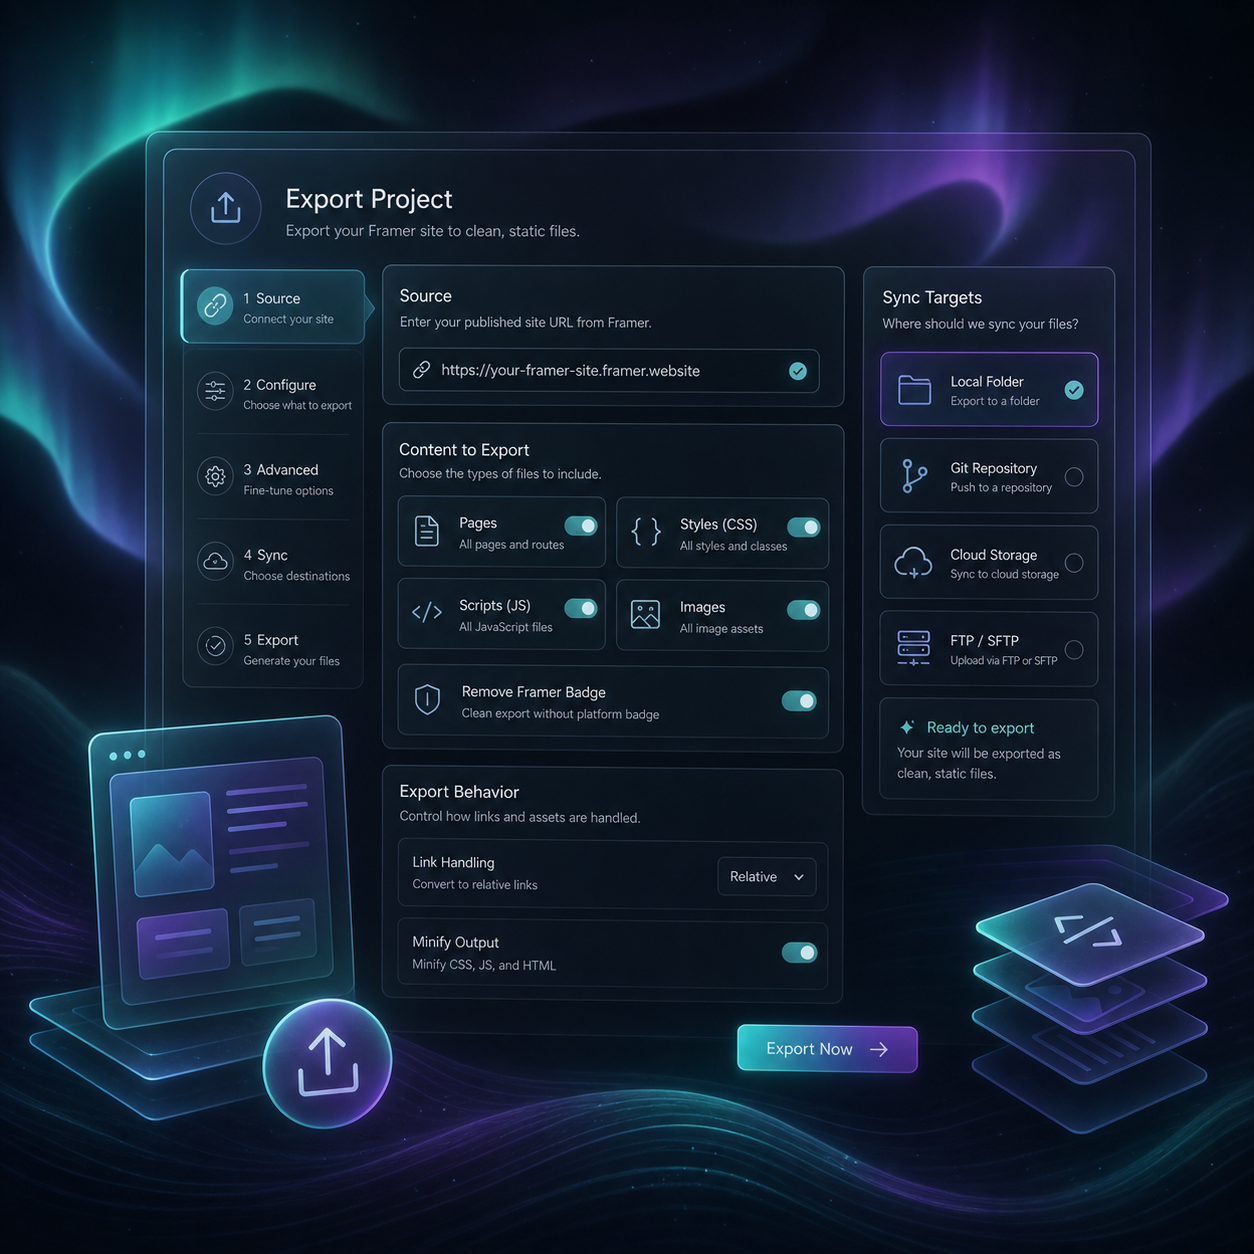
Expected result: the site configuration screen loads and the URL is accepted.
3. Choose the export settings carefully
This is the part that decides whether the export feels complete or fragile. For a typical migration, I would include:
- Export CSS Files
- Export JS Files
- Export Images / Media Files
- Export All Pages
- Remove Made with Framer Badge
- Add custom script.js and style.css files
ExFlow also exports pages with a .html extension, which matters if you want a plain static site structure instead of a Framer-specific wrapper. If your project needs extra behavior after export, this is the place to add it instead of patching the site later.
Expected result: the exported folder contains the assets and page files the live site depends on.
4. Pick the destination before you download
ExFlow is useful because export is not the end of the workflow. You can download the files directly, sync them to Git, push them to S3, send them over FTP, or host the site on ExFlow itself.
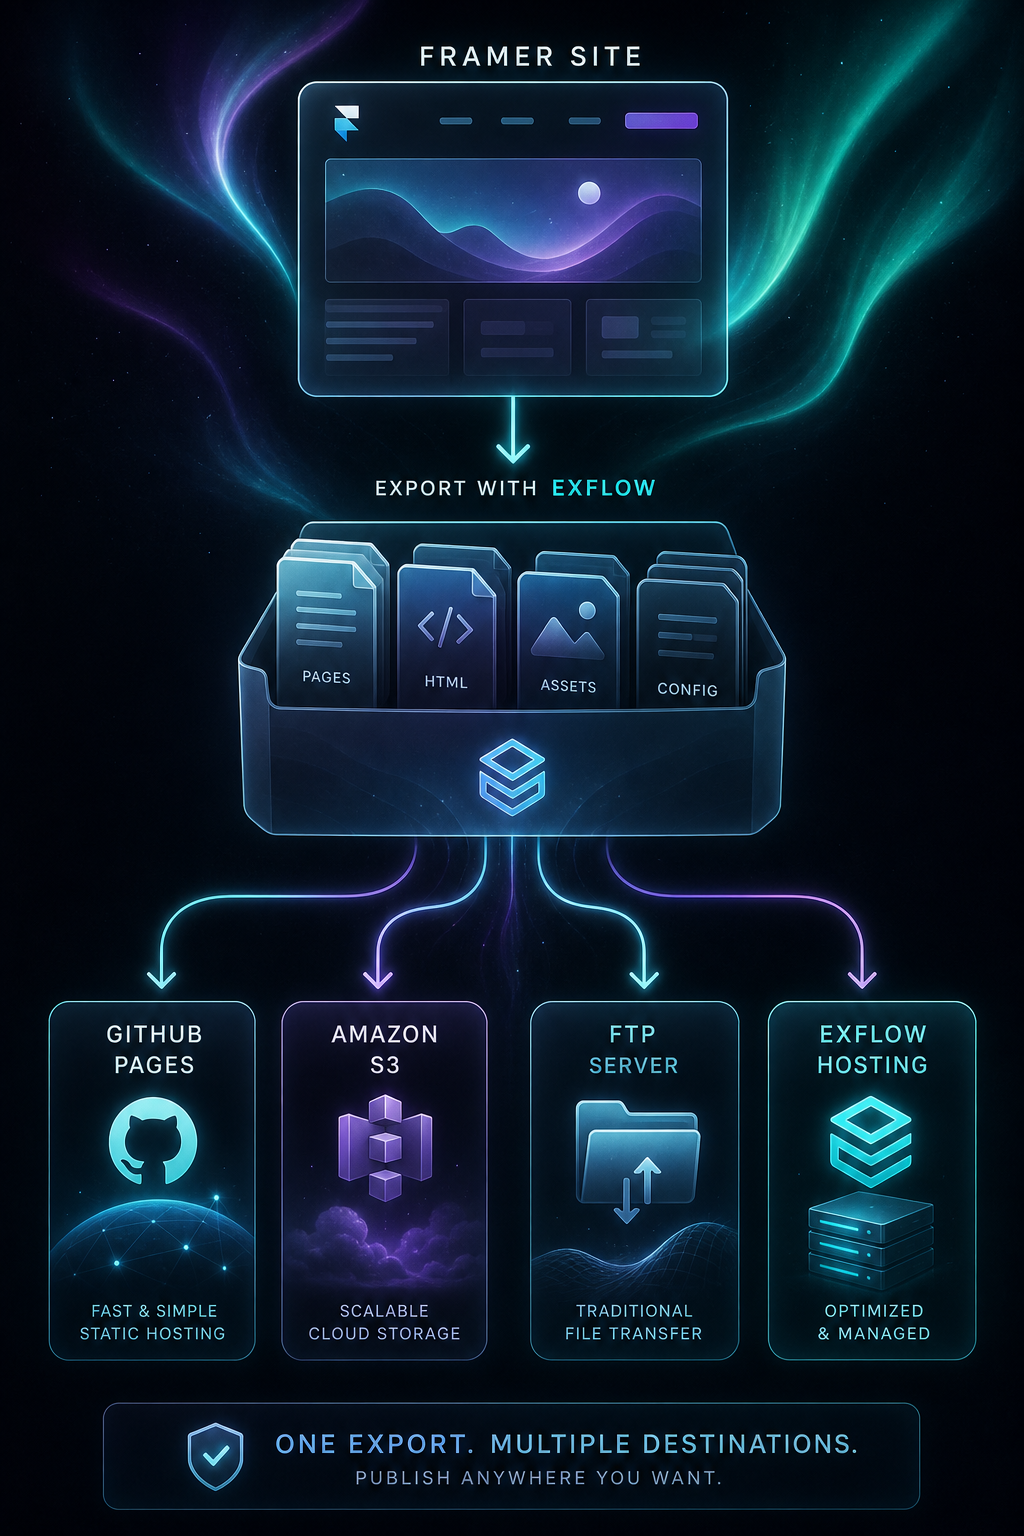
If you choose Git, S3, or FTP sync, treat those credentials like production secrets. Enter them once, verify the target, and avoid sharing them in screenshots or notes. If you choose ExFlow hosting, check Hosting Status after the export so you know the deployment is actually live.
Expected result: the exported site is either in your repository, on your storage bucket, on your server, or on ExFlow hosting.
5. Review the export before you switch traffic
Do not point users at the exported site until you have opened a few pages and checked the basic behavior. Start with the homepage, then check one interior page, then confirm that assets load and the links still resolve the way you expect.

I would also confirm that the page structure still matches the live Framer site after export, especially if the site depends on animations, nested sections, or media-heavy content. That is where the export either feels dependable or starts drifting from the original build.
Expected result: the static version loads cleanly and behaves like the site you intended to ship.
When ExFlow is the right fit
I think this workflow makes the most sense when you want a Framer site to become portable instead of trapped in one hosting model. It is especially useful if you care about static hosting, repository-based deployment, or moving a site into a setup you can own for the long term.
If you are comparing this with another migration path, How to Self-Host a Webflow CMS Site Without Rebuilding It and How to Export a Squarespace Site to Git, S3, or FTP Without Rebuilding It show the same tradeoff from two other builders. If you want the version-controlled mindset behind a good export workflow, How to Build a Git-Friendly Video Template System With VideoFlow is a useful parallel. And if you want a preflight checklist before any migration, How to Audit a Webflow Site Before You Export It is a solid companion.
The simplest next step is to test one Framer URL in ExFlow.site, choose the smallest export that still preserves the site, and verify the result before you move on to a full migration.